Repair Leak PVC Pipe: Easy DIY Fixes from Pros
- Luke Yeates
- Aug 7, 2025
- 11 min read
So, you've found a leak in a PVC pipe. Before you start pulling out tools, the first and most important decision is whether this is a job for you or for a professional. It's a question of confidence versus complexity.
Frankly, some leaks are perfect for a keen DIYer. If you've got a slow drip on a straight, easy-to-reach section of pipe, you can often handle it with a simple repair kit. But if you're looking at a leak near a major joint, inside a wall, or one that's already caused a fair bit of water damage, calling in an expert is almost always the smarter, safer, and ultimately cheaper option. At Harrlie Plumbing and Heating, we've helped countless Eastbourne residents make this very call.
Assessing the Drip: When to DIY and When to Call an Expert
That persistent drip, drip, drip isn't just a soundtrack for a sleepless night; it's your plumbing crying out for help. One of the most common calls we get in Eastbourne is for a damp patch spreading across the cabinet floor under a sink. It’s a classic sign of a PVC pipe leak. These can pop up for all sorts of reasons, from a joint that's worked itself loose to the slow, steady toll that our local Eastbourne hard water takes on plumbing systems.
Your first job is to play detective. The location and size of the leak will tell you everything you need to know. A slow, steady weep from the middle of a straight pipe is a world away from a frantic spray shooting out of a T-joint connecting your dishwasher and washing machine.
Your Quick Decision Guide
Making the right call at this stage can save you a mountain of stress and money. It’s what separates a quick fix from a full-blown water damage disaster. We’ve seen it all at Harrlie Plumbing and Heating—well-meaning homeowners who tried to tackle a fix that was just a bit beyond their skill set, accidentally turning a simple job into a much bigger, messier problem.
This quick guide should help you figure out the best course of action. It's pretty much the same mental checklist our own engineers run through when they first arrive on a job, whether it's in Meads or Hampden Park.
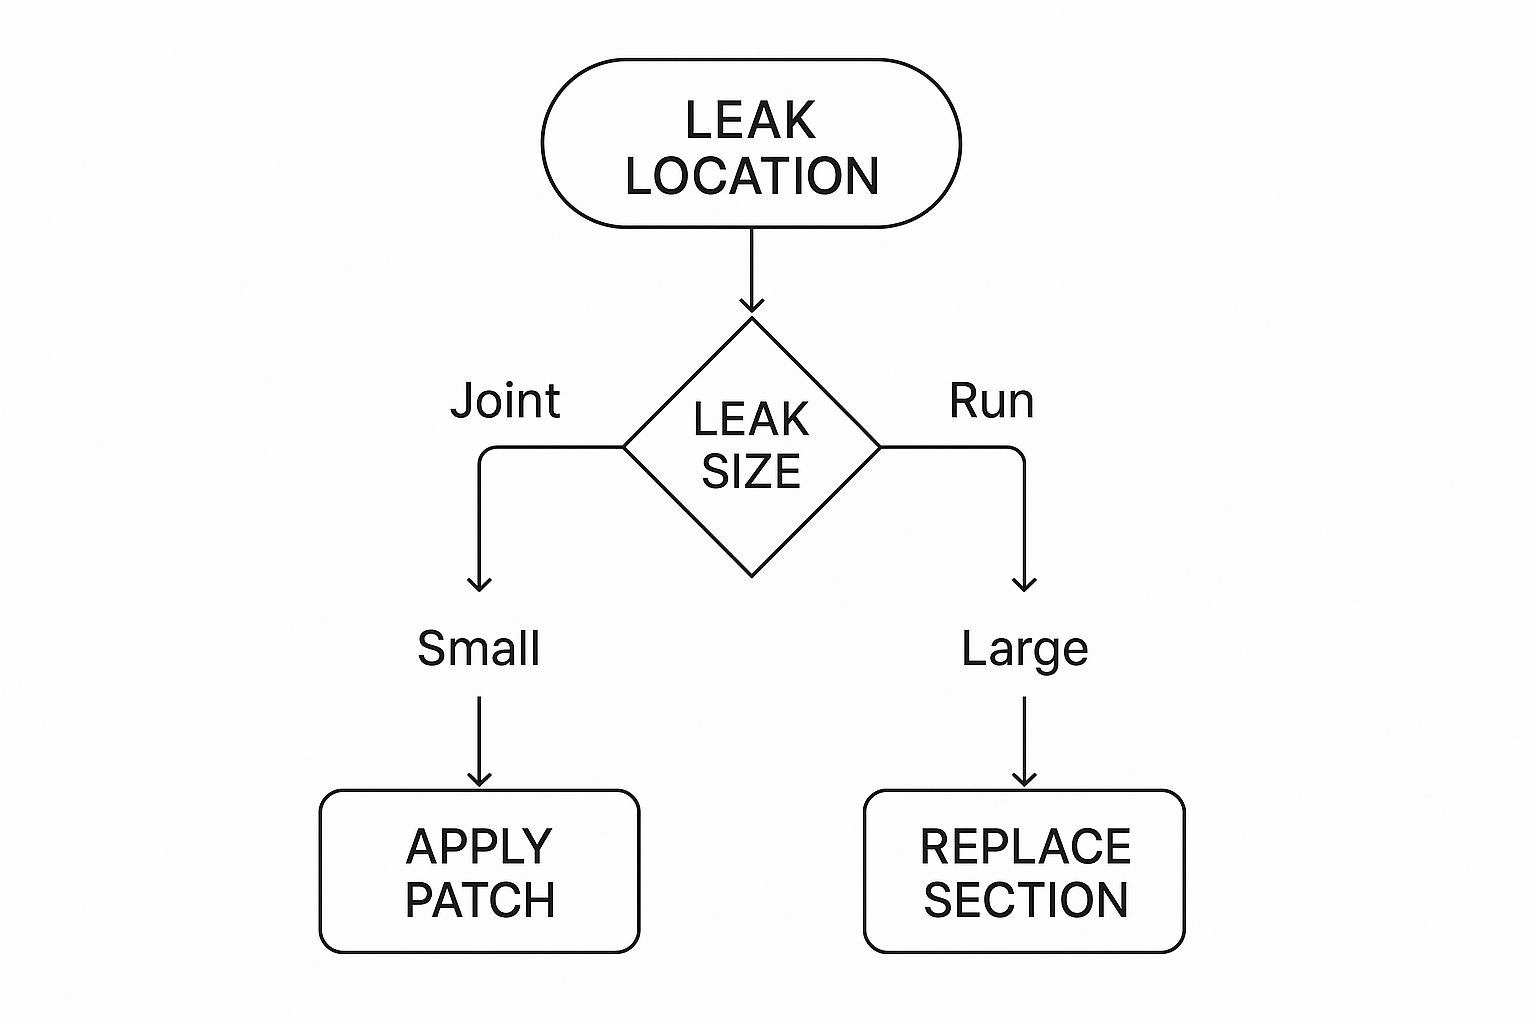
The main takeaway? Small, manageable leaks on straight runs are often good candidates for a patch. Anything bigger, more complex, or on a critical joint usually means that section of pipe needs to be cut out and replaced properly.
With the UK PVC pipes market projected to grow to an estimated USD 3.1 billion by 2031, knowing how to properly look after this common material is becoming more important for every homeowner.
Our advice? If you feel confident tackling a small leak, go for it. But if that leak is anywhere near an appliance, hidden away, or looks more serious than a simple drip, it’s always best to get a professional opinion from a local team like ours. Sometimes, what looks like a pipe problem is actually an issue with a fixture. We see this a lot with taps, which is why we put together our guide on how to fix a leaking tap.
Leak Severity: DIY or Call a Pro?
To make it even clearer, here’s a quick reference table. It’s designed to help homeowners in the Eastbourne area quickly size up their PVC pipe leak and decide on the best plan of attack.
Leak Symptom | Potential Cause | Recommended Action |
|---|---|---|
Slow, steady drip on a straight pipe | A small pinhole or hairline crack | Good for DIY. A fibreglass wrap or epoxy putty repair kit should do the trick. |
Puddle of water under a joint or fitting | Loose connection or failing cement seal | Call a Pro. Joints are critical stress points. A proper repair often means replacing the entire fitting. |
Damp patch on wall/ceiling | A hidden leak within the wall cavity | Call a Pro Immediately. This requires locating the leak without causing more damage, a job for an experienced plumber. |
Spraying or gushing water | A significant crack or burst pipe | Emergency Call Out. Shut off your water main and call a professional like Harrlie Plumbing and Heating right away to prevent major flooding. |
Visible crack with no active leaking (yet) | DIY or Pro. You can pre-emptively patch this, but a pro replacement is the only guaranteed long-term fix. |
Think of this table as your first line of defence. Being honest about the scale of the problem and your own capabilities is the hallmark of a smart homeowner. When in doubt, a quick phone call costs nothing and can save you a fortune.
Getting Your PVC Repair Kit Ready
A good fix for a leaking PVC pipe isn’t about muscle; it's about having the right gear for a clean, professional job. You might think a hacksaw will do, but they often leave behind a rough, uneven edge that makes a proper seal almost impossible. This is exactly why our team at Harrlie Plumbing and Heating uses dedicated PVC pipe cutters. They give you a perfectly square, clean cut every single time—which is non-negotiable for a joint that won’t leak.
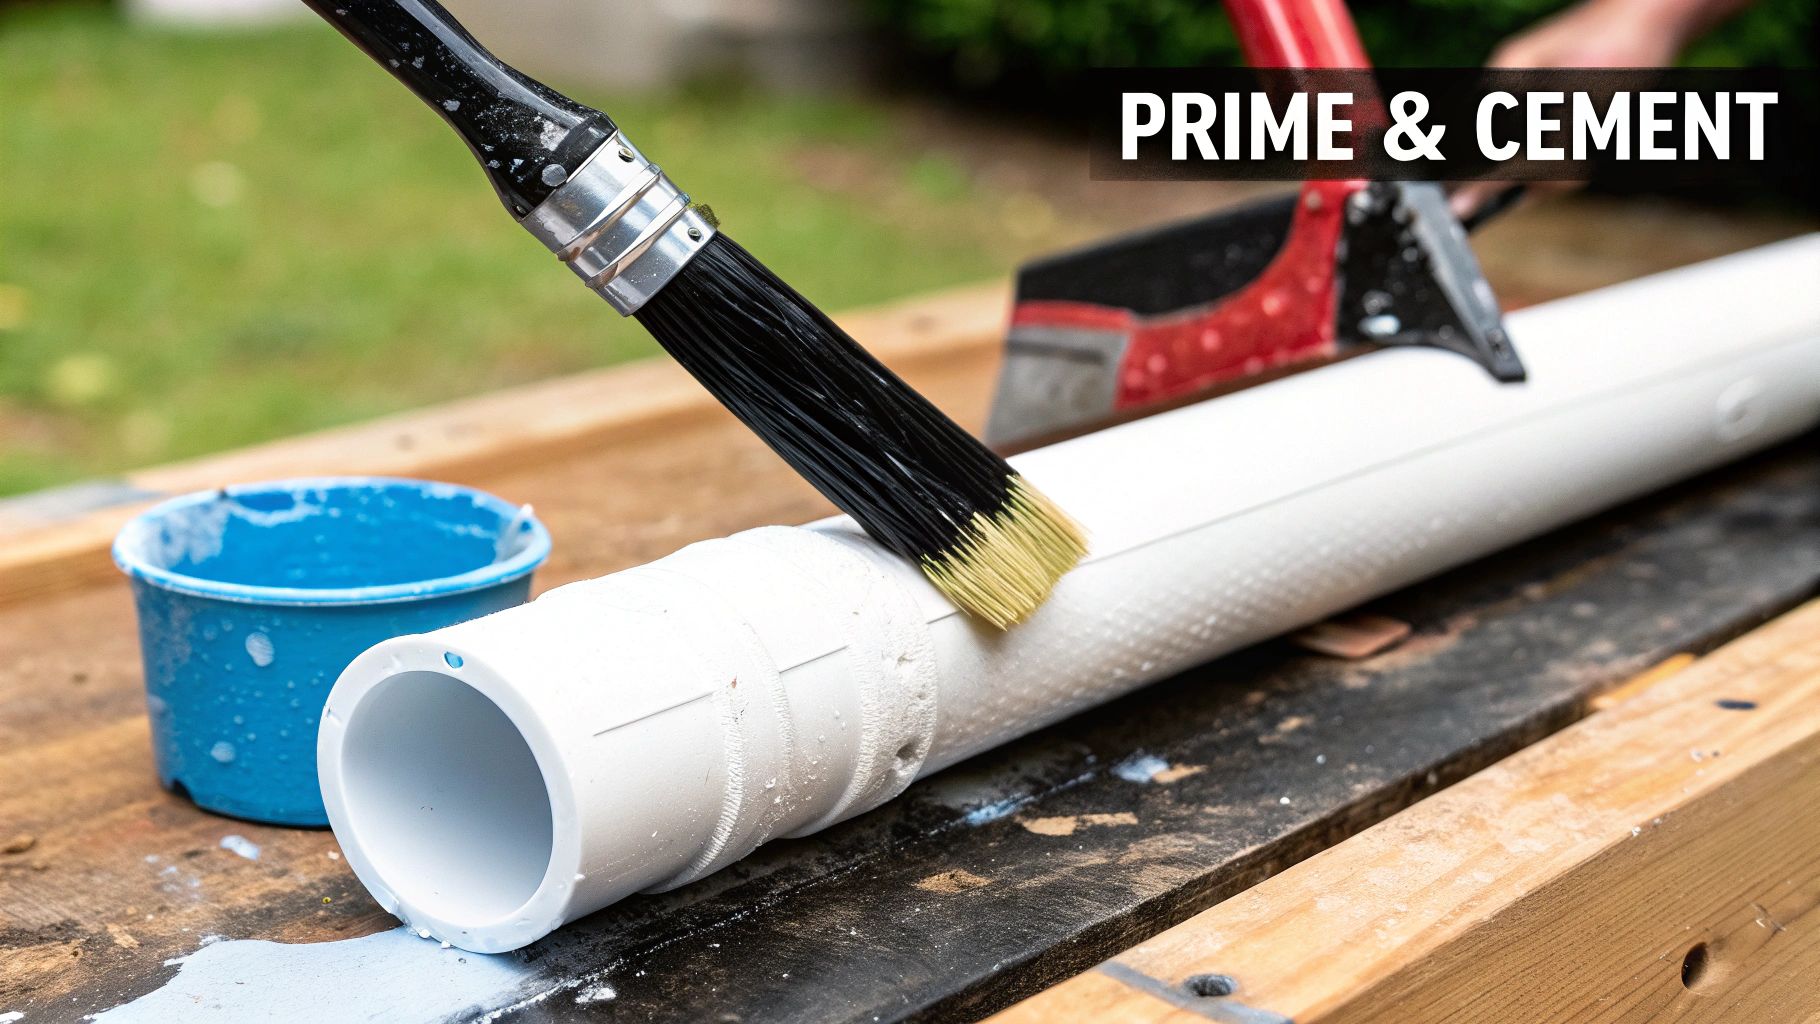
Once your cutting tool is sorted, the next vital items are PVC primer and solvent cement. Don't be tempted to skip the primer; it’s not an optional extra. It chemically cleans and softens the plastic, getting it ready for a permanent molecular bond. Following up with a quality solvent cement ensures the new fitting essentially becomes one with the existing pipework.
Your Go-To Shopping List
For a typical DIY project to repair a leak in a PVC pipe, this is what you'll want to have on hand. You should be able to find everything at the larger hardware shops around Eastbourne.
PVC Pipe Cutters: Essential for that clean, professional cut.
Tape Measure: Accuracy is everything here.
PVC Primer & Solvent Cement: This pair is what creates that strong, welded bond.
Replacement PVC Pipe & Fittings: It’s a smart move to buy a little more than you’ve measured for. This small tip has saved our Eastbourne team a second trip to the shop more times than we can count.
Deburring Tool: To smooth out the inside and outside of the cut pipe.
Clean, Dry Cloths: For wiping the pipe ends clean before you apply the primer.
Safety is a huge deal, especially when you’re working with chemical adhesives in a tight spot like under the kitchen sink.
"Proper ventilation is probably the most overlooked safety step in a DIY plumbing repair. The fumes from PVC primer and cement are pretty potent and can be harmful. Always crack open a window or set up a small fan to get the air moving before you even open the tins."
This simple step is standard procedure on all our jobs at Harrlie Plumbing and Heating. It’s a crucial habit to get into for protecting your health while you focus on the repair.
Preparing the Pipe for a Perfect Repair
When you want to repair a leak in a PVC pipe, a lasting fix really comes down to the prep work. It’s the careful, methodical steps you take before ever touching the adhesive that makes all the difference. At Harrlie Plumbing and Heating, we know from experience that this stage is non-negotiable if you want a bond that holds up.
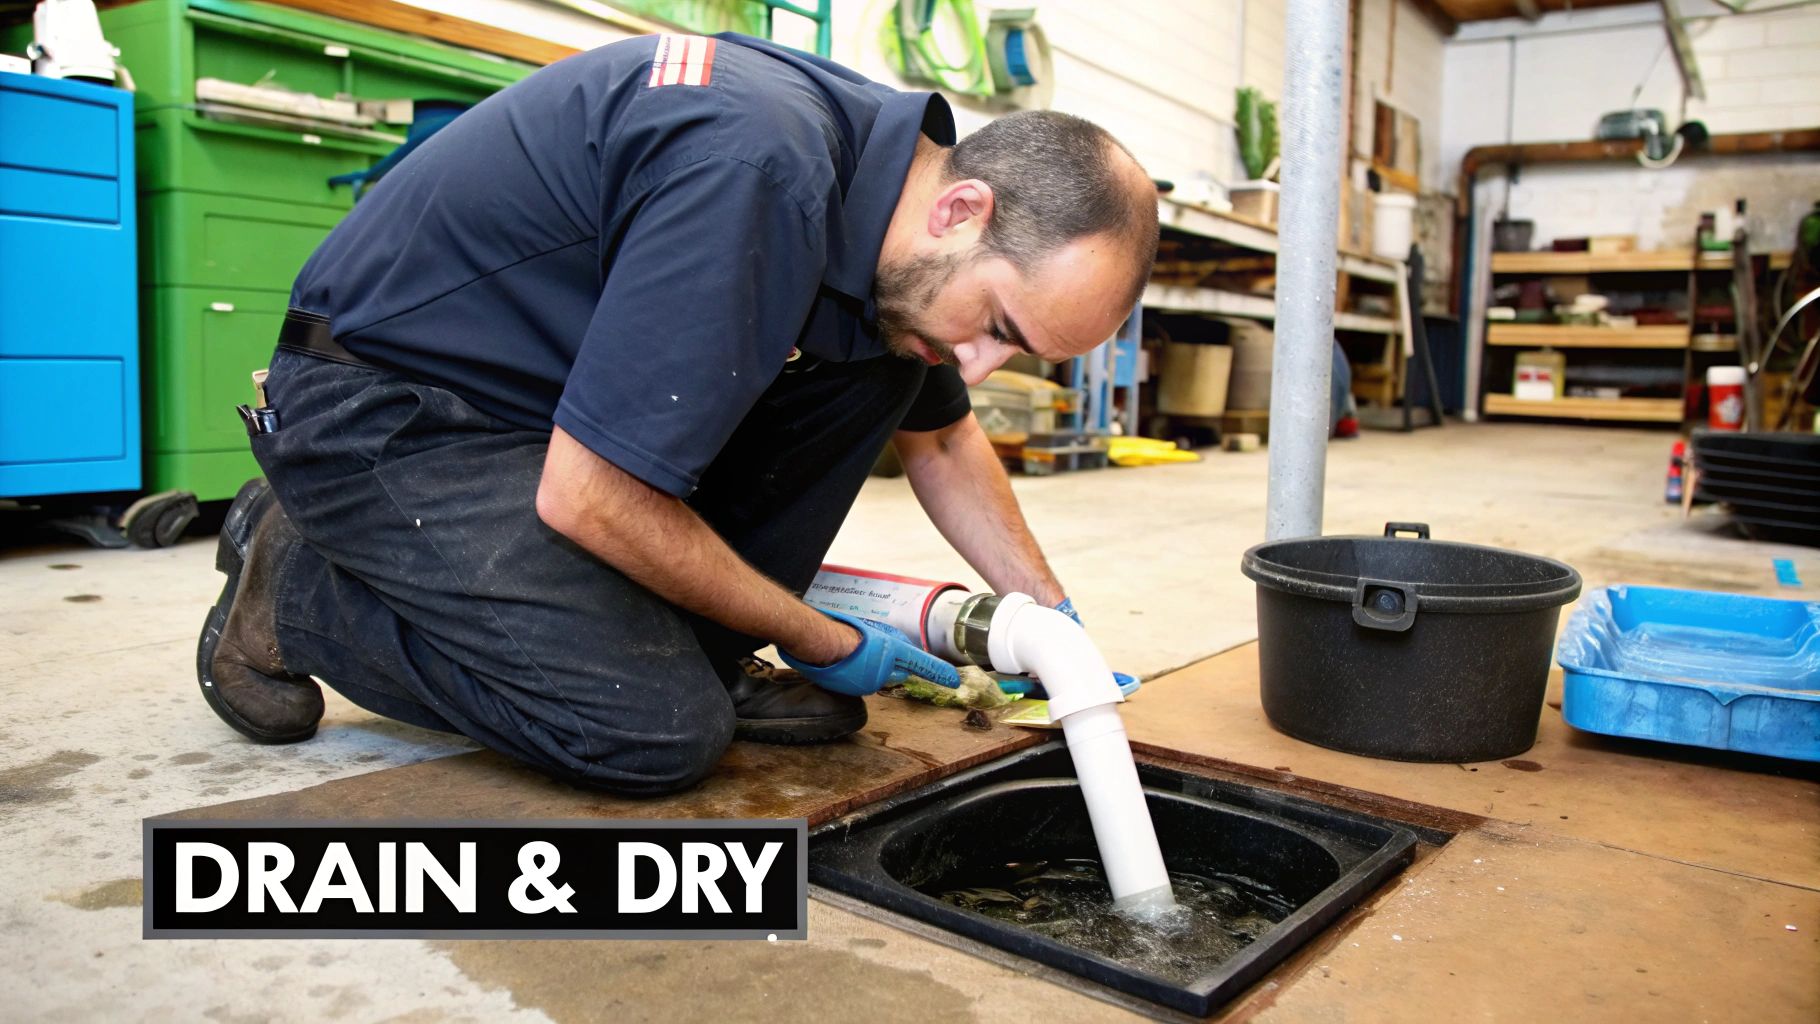
First things first, you absolutely must shut off the water supply feeding that pipe. If it's under a sink, you're usually just looking for the isolation valve. A quick turn and you're set. Then, pop a bucket or some old towels underneath and make sure the pipe is completely empty. Even a single drop of water can completely ruin a solvent weld.
Achieving a Clean Slate
Let's imagine a common job we see all the time in Eastbourne: a leaking waste pipe under a sink in an older property in the Old Town area. The aim here is to get the pipe surface spotless for the new fitting. That means it has to be perfectly clean and bone-dry.
Start by wiping down the area around the leak with a clean, dry cloth to get rid of any grime or lingering moisture.
Once you've cut your pipe, give the ends a light sanding. This scuffs up the glossy factory finish, creating a much better surface for the primer and cement to grip onto.
Taking the time for this ensures the solvent weld creates a proper molecular bond, instead of just sticking to a layer of surface dirt.
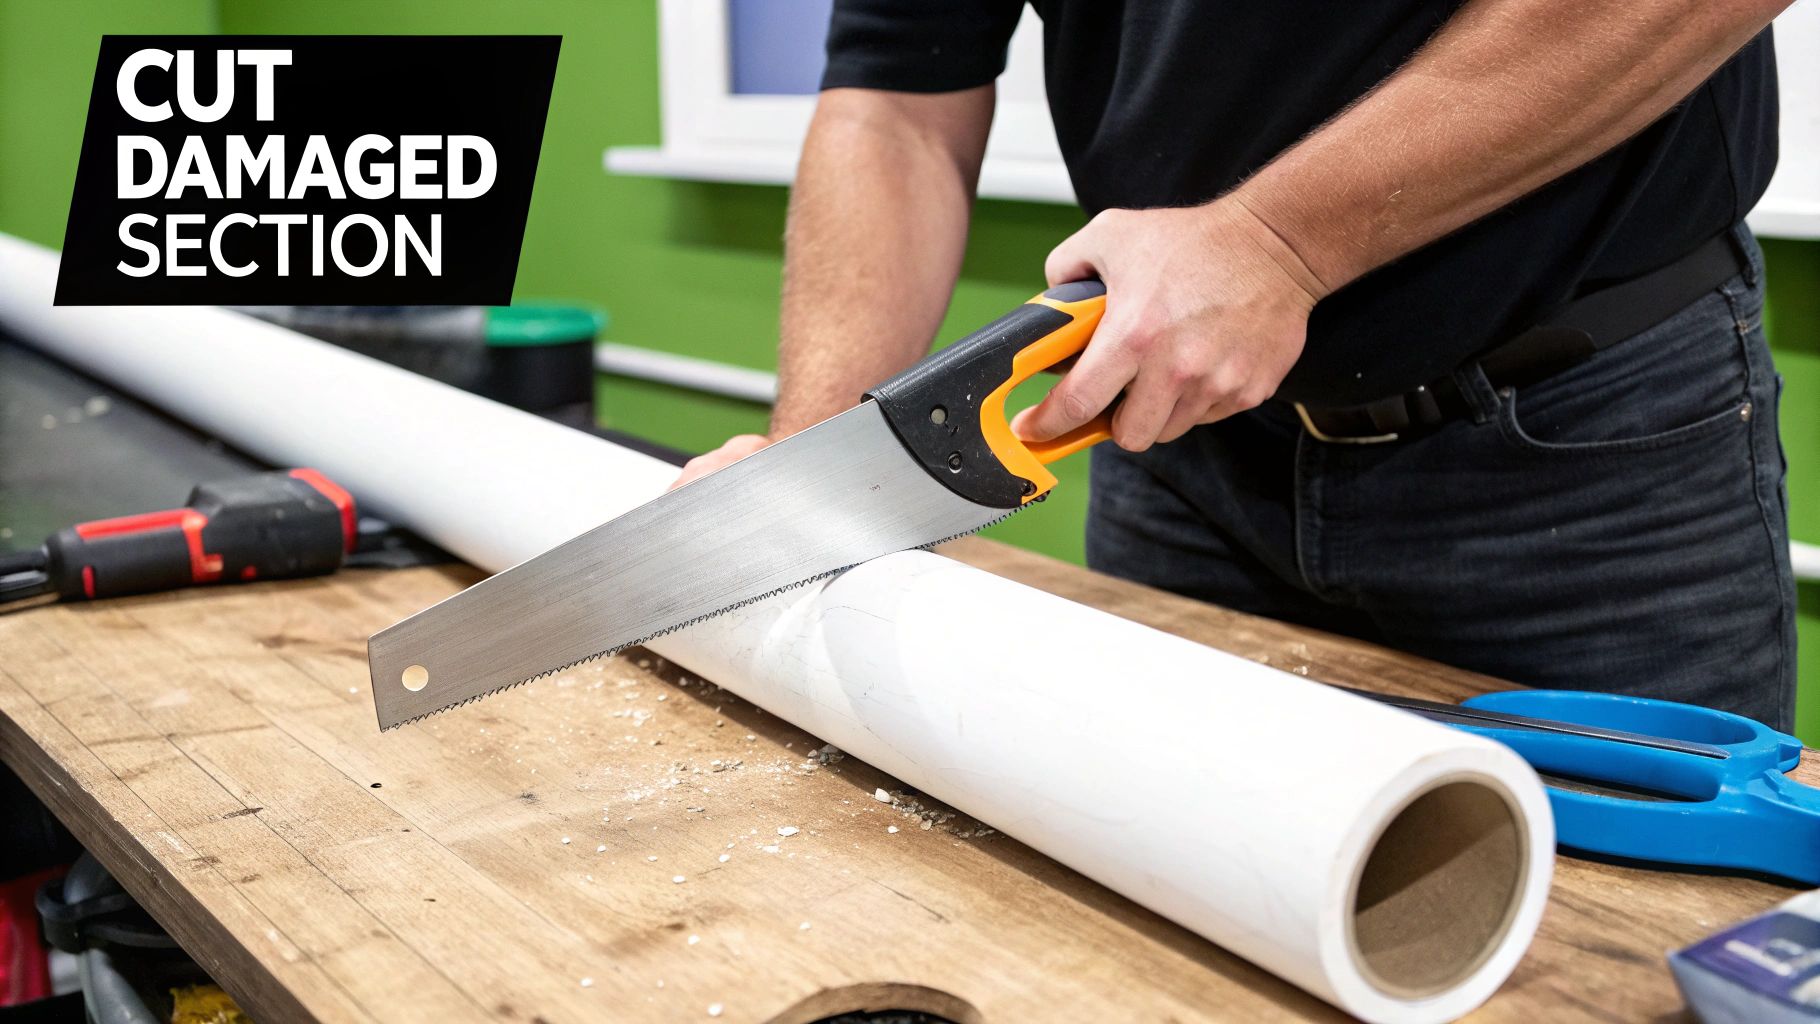
Measuring and Cutting with Precision
With the pipe clean, it’s time to cut out the bad section. Measure carefully, marking the pipe about an inch or so on either side of the leak. For the best result, use a proper PVC pipe cutter. It gives you a clean, square cut every time, which is miles better than what a hacksaw can do. A hacksaw often leaves behind little burrs and an angled edge that's just asking for another leak down the line.
The secret to a seamless repair is ensuring the new section fits perfectly without any stress on the joints. When we cut out a damaged pipe, we're not just removing the problem; we're creating the perfect foundation for the solution.
It's clear people are taking these jobs more seriously. Spending on housing repair and maintenance in the UK shot up by 16.6% recently. In fact, total R&M output topped USD 84 billion back in 2022, which just goes to show how vital reliable repairs are. You can learn more by checking out the United Kingdom plumbing pipe market research.
Executing a Flawless PVC Pipe Repair
This is the moment where all your careful prep work pays off. With the damaged section gone and the pipe ends clean and dry, you’re ready to complete the repair of your leaking PVC pipe. But before you even think about cracking open the adhesive, you need to ‘dry-fit’ all your new components.
A dry-fit simply means assembling the new pipe and fittings without any glue. It’s a crucial step that ensures everything lines up perfectly without putting any stress on the joints. We often see DIY repairs in Eastbourne homes fail because this step was skipped, leading to a forced fit that cracks under pressure later on.
Applying Solvent Cement Like a Pro
Once you're happy with the dry-fit, it's time for the final, permanent assembly. You’ll need to work quickly but methodically, as the solvent cement starts setting almost immediately. First, apply a thin, even layer of primer to the outside of the pipe and the inside of the fitting. Follow this with a layer of the solvent cement in the same way.
When you push the pipe into the fitting, give it a quarter-turn. This is a classic technique our Harrlie Plumbing and Heating engineers always use. It helps spread the cement evenly and creates a complete, leak-proof chemical weld around the entire joint.
One of the biggest mistakes we see is using far too much cement. It sounds counter-intuitive, but any excess glue can get pushed inside the pipe, creating a small ridge. This ridge is notorious for catching debris and can cause a future blockage. A thin, even coat is all you need for a permanent bond.
Choosing the Right Repair Method
The type of fitting you need really depends on the nature of the damage. For a simple hairline crack on a straight run of pipe, a slip coupling is often the best and easiest solution. It’s essentially a short tube that slides over the two cut ends of the pipe, neatly bridging the gap.
However, if the leak is on or near a joint, like a T-piece or an elbow, you'll have to cut out and replace the entire fitting. This is certainly more involved, but it’s the only way to guarantee a lasting fix. Attempting to just patch up a damaged fitting is a recipe for a recurring problem down the line.
For a more detailed breakdown of different techniques, our team has put together a helpful resource on repairing water pipes for homeowners.
Knowing When to Call in a Plumbing Professional
There's a great sense of satisfaction that comes from a successful DIY repair, but being a smart homeowner also means knowing when to put the tools down. Some jobs just carry too much risk, where a simple attempt to repair a leaking PVC pipe can quickly snowball into a full-blown disaster.
If you’ve found a leak hidden away inside a wall, or you’re dealing with a problem on your main water line or soil stack, it’s time to call for backup. These aren’t your average fixes.
Tackling these more complex issues demands real experience and specialist gear to sort things out without causing a load of structural damage. And if you have a leak that just keeps coming back after you've fixed it, that's often a tell-tale sign of a bigger problem, like system-wide high water pressure. A simple patch just won’t cut it.
A Cautionary Tale from Eastbourne
We once got an emergency call from a homeowner in the Sovereign Harbour area of Eastbourne who’d tried to fix a leak on their main soil stack up in the loft. On the surface, it seemed straightforward enough. But the sheer awkwardness of the location and the size of the pipe made it a nightmare of a job. Their repair attempt actually made the crack worse, leading to some serious water damage on the ceiling below before they finally called us at Harrlie Plumbing and Heating.
Their story is a vital reminder: for certain jobs, the quickest, safest, and most cost-effective solution is to contact a certified professional immediately. It prevents a manageable issue from spiralling into a costly disaster.
It's surprising just how often these things happen. Between 2023 and 2024, there were roughly 44,616 pipe repairs across England and Wales, which really shows how common burst or leaking pipes are. You can discover more insights about UK leakage statistics to see why getting these repairs done right and on time is so important.
Knowing when to call is one thing, but knowing who to call is just as crucial. If you're feeling a bit lost, have a look at our guide on the essential tips for finding the right plumber in Eastbourne.
Common Questions About PVC Pipe Repairs
Even after you've successfully managed to repair a leak in a PVC pipe, it's natural to have a few lingering questions. Getting these details right is what ensures your handiwork holds up for the long haul. We've gathered some of the most common queries we hear from homeowners in and around Eastbourne to give you that extra bit of confidence.
How Long Before I Can Turn the Water Back On?
Patience here is absolutely essential. Most PVC cements will feel firm to the touch in about 15-30 minutes, but don't be fooled—this is only the initial bond. To properly cure and be strong enough to withstand water pressure, you need to wait quite a bit longer.
At Harrlie Plumbing and Heating, we always advise our Eastbourne clients to wait a full 24 hours for maximum joint strength, especially for any pipes that will be under pressure. This gives the solvent weld time to fully harden into a permanent, watertight seal, so you won’t find yourself doing the job all over again.
Are Repair Tapes and Putties a Good Permanent Fix?
While emergency repair tapes and epoxy putties are fantastic for stopping a leak in a pinch, they should always be seen as a temporary solution. They simply don’t offer the same structural integrity as a proper solvent-welded repair.
From our experience working in Eastbourne homes, we’ve seen these temporary patches fail without warning, often leading to bigger, messier problems than the original leak. The only truly reliable, long-term fix is to correctly cut out the damaged section and replace it with new PVC pipe and fittings.
Is Fixing a Leaky Threaded PVC Joint Different?
Yes, the approach for a leaking threaded joint is completely different. It's crucial that you do not use PVC cement on threads. If you have a threaded fitting that's weeping, your first step is to shut off the water and carefully unscrew the connection.
Start by cleaning off all the old tape and any gunk from both the male and female threads.
Next, wrap fresh PTFE tape (often called plumber's tape) clockwise around the male threads about 3-4 times.
For an extra layer of protection, you can apply a thin coat of pipe joint compound over the tape.
Finally, re-tighten the fitting until it feels snug. Be careful not to overtighten, as this is an easy way to crack the plastic fitting and create a much bigger problem.
If your PVC pipe problem feels a bit beyond a DIY fix, or you just want the peace of mind that comes with a professional job, don't hesitate to reach out. The team at Harrlie Plumbing and Heating is always ready to help residents in Eastbourne and the surrounding areas. Visit us online or give us a call for a fast, reliable solution.
