How to Fix a Leaking Tap: An Eastbourne DIY Repair Guide
- Luke Yeates
- Aug 5, 2025
- 13 min read

When you find a leaking tap, the fix is often surprisingly simple. Most of the time, it's just a worn-out internal part, like a rubber washer or an O-ring, that needs replacing. It’s a classic DIY job: shut off the water, take the tap handle apart, swap the old component for a new one, and put it all back together. Once you get the hang of it, you can silence that annoying drip all by yourself.
Why You Should Never Ignore a Dripping Tap
That relentless drip-drip-drip from a leaking tap isn’t just a minor annoyance; it’s a constant reminder of water and money literally going down the drain. Here in Eastbourne, where we’re all conscious of water conservation, a single leaky tap can waste thousands of litres every year, slowly but surely inflating your utility bills.
Ignoring it is guaranteed to make things worse. At Harrlie Plumbing and Heating, we see it all the time—a simple, cheap fix that was put off until it became a much bigger headache. The hard water we have across Eastbourne and East Sussex is particularly tough on tap components, speeding up wear and tear and making small drips a common problem for local households.
The Real Cost of a Small Drip
What starts as a tiny issue can quickly snowball. A persistent leak can cause a lot more trouble than you’d think:
Water Damage: That constant moisture will eventually damage your sink, worktop, and the cabinet underneath. Before you know it, you’re dealing with rot and structural issues.
Mould Growth: Damp, dark spaces are the perfect breeding ground for mould and mildew, which can seriously affect your home's air quality and your family's health.
Higher Bills: A tap dripping just once per second can waste over 11,000 litres of water a year. That's a significant and completely unnecessary hit to your wallet.
In our experience at Harrlie Plumbing and Heating, the two most common culprits are either a worn-out washer in older-style compression taps found in many Eastbourne homes, or a failing ceramic disc in more modern mixer taps. Both are straightforward fixes, but leaving them unresolved is a surefire way to let the problem escalate.
Weighing the Cost of Repair
So, do you tackle it yourself or call in a professional? The decision usually boils down to cost and complexity. In the UK, getting a professional to replace a leaking tap is a frequent job, with costs typically ranging from £80 to £200. For example, the basin pillar taps themselves might cost around £27.50, with labour adding about £80 for a straightforward installation.
Dealing with the drip quickly isn’t just about saving money; it’s about conserving water. It’s always worth looking into UK tap replacement costs to understand the financial side of things and make an informed choice.
Right then, let’s get our hands dirty. Before you even think about touching that tap, the secret to a stress-free fix is having everything you need within arm’s reach. Trust me, there’s nothing worse than turning the water off only to realise you’re missing a crucial bit of kit.
We see it all the time here at Harrlie Plumbing and Heating. A five-minute job turns into an all-day saga, all because the right tool wasn't ready from the get-go. A little bit of prep saves a world of hassle and stops you from accidentally making things worse.
Your Core Tool Checklist
Good news – you probably won’t need a toolbox worthy of a professional plumber. Most common tap repairs in Eastbourne homes can be sorted with just a few key items.
Adjustable Spanner: This is your best mate for this job. Its adjustable jaw means it can handle pretty much any nut or fitting you'll find on a tap. It’s incredibly versatile.
Set of Screwdrivers: You’ll want both a flat-head and a cross-head (Phillips). The screw holding the tap handle on is often tiny and tucked away under a little decorative cap.
Basin Wrench: This odd-looking tool is a real knuckle-saver. It’s specially designed to get at those awkward, hard-to-reach nuts that clamp the tap to the sink itself.
Old Towels or Rags: Absolutely essential. You'll need these to mop up any leftover water in the pipes and to protect your sink or basin from getting scratched by your tools.
Before you start pulling things apart, let’s make sure you have the essentials. Here's a quick rundown of what I'd recommend having on hand.
Essential Tools for Fixing a Leaking Tap
Tool/Material | Purpose | Eastbourne Pro Tip |
|---|---|---|
Adjustable Spanner | To loosen and tighten the nuts holding the tap body and internal parts. | Get one with a slim jaw. It makes getting into tight spaces behind the sink so much easier. |
Screwdrivers | For removing the handle screw, which is often hidden under a cap. | A set with magnetic tips is a lifesaver for not losing those tiny screws down the plughole! |
Basin Wrench | Reaching the nuts that secure the tap to the underside of the sink. | This tool can feel awkward at first, but it gives you the leverage you need without having to be a contortionist. It's well worth the small cost. |
Replacement Parts | The specific washer, O-ring, or ceramic cartridge for your tap model. | Take a clear photo of your tap before you go to a local Eastbourne hardware shop. Showing it to the staff is the best way to get the exact part you need. |
Old Towels/Rags | Soaking up residual water and protecting surfaces from scratches. | Lay a towel in the bottom of the sink. It'll catch any dropped tools and prevent chipping your porcelain or stainless steel. |
Plumber's Putty/Tape | Sometimes needed to create a watertight seal when reassembling the tap. | Not always necessary, but good to have. The putty is for the base of the tap, and the tape is for threaded pipe connections. |
Having these items ready transforms the job from a potential headache into a straightforward task.
A top tip from our Harrlie Plumbing and Heating team: before heading to a hardware store in Eastbourne, take a clear photo of your tap and any parts you remove. Showing the picture to staff is the single best way to ensure you walk out with the correct replacement washer or cartridge.

Identifying Replacement Parts
Once you have your tools, you need the right replacement bits. More often than not, the problem comes down to a simple, cheap component that's just worn out from daily use.
Your leak is most likely caused by one of these:
Washers or O-rings: In traditional compression taps, these little rubber seals are the number one cause of drips. They perish over time.
Ceramic Disc Cartridge: Modern mixer taps use these. It's a single unit that controls the water flow, and if it fails, you generally have to replace the whole cartridge.
Now, sometimes a constant drip isn't just about a worn-out washer. If the leak is happening alongside a noticeable drop in flow, it could point to a bigger issue with your system's water pressure. It might be worth checking out our guide on how to fix water pressure in your Eastbourne home. This can help you figure out if there's something else going on.
How to Diagnose Your Leaking Tap
Alright, before you even think about picking up a spanner, you need to play detective. Figuring out exactly why your tap is leaking is the most important part of the job. It tells you what’s broken, what parts you’ll need, and where to focus your efforts.
Get this right, and you'll save yourself time, a trip to the DIY shop, and a whole lot of head-scratching.
Taps aren't all the same, and the type you have in your Eastbourne home will point you to the likely culprit. Many older properties still have traditional compression taps that rely on rubber washers. Newer homes? They usually feature modern ceramic disc or cartridge taps.
Where Is the Water Coming From?
The location of the leak is your biggest clue. A bit of careful observation will tell you almost everything you need to know about what’s gone wrong inside that tap.
Dripping from the spout? This is the classic, most common type of leak. Nine times out of ten, it means an internal seal has given up. For old-school compression taps, that’s almost certainly the washer. In modern taps, you’re looking at a failed ceramic disc or cartridge.
Water seeping from the base of the tap? If you’re seeing a little puddle forming where the tap body meets the sink, the problem is likely a worn-out O-ring or seal at the base.
Leaking from under the handle? This usually points to an issue with the O-rings around the valve stem, or sometimes a fault within the cartridge itself.
At Harrlie Plumbing and Heating, we see this all the time. The hard water we have here in Eastbourne is tough on rubber washers and O-rings. Mineral buildup makes them go brittle and crack, which is what causes those annoying, persistent drips.
Identifying Your Tap Type
Knowing what kind of tap you're dealing with is absolutely crucial for a successful repair. Just take a look at how it works—that’s all you need to do to figure it out.
Compression Taps (Washer Taps)These are the old-fashioned taps, usually with separate hot and cold handles that you have to turn a few times to get the water flowing at full pelt. They work by using a screw to compress a rubber washer against a valve seat, stopping the water. If you find you have to turn the handle tighter and tighter to stop the drip, that’s a dead giveaway the washer is on its last legs.
Ceramic Disc or Cartridge TapsThese are the more modern taps. They often have a single lever you lift and turn, or handles that only need a quick quarter or half-turn to go from off to fully on. Inside, they have a durable ceramic cartridge that controls the water flow. When these start leaking, you generally have to replace the entire internal cartridge.
Getting the diagnosis right is especially important in the lovely older homes we have all over Eastbourne. These properties often come with their own unique plumbing quirks that need a careful eye. You can find out more about these in our guide to the common plumbing issues in older Eastbourne properties.
Once you've correctly identified your tap type, you're on the right track for a proper fix that will keep your home dry and your water bills down.
Your Actionable Guide to Stopping the Drip
Right, with the detective work done, it's time to roll up your sleeves and stop that annoying drip for good. This is where a bit of patience and methodical work really pays off. Let's walk through the process together, so you feel confident tackling the job safely and getting it right the first time.
First things first, and this is non-negotiable: shut off the water supply. You absolutely cannot skip this. Have a look for the small isolation valves on the pipes directly underneath your sink—there should be one for hot and one for cold. A simple quarter turn with a flat-head screwdriver usually does the trick. If you can’t spot them, you'll need to find the main stopcock for the whole house and turn it off there. Once that's done, turn the leaking tap on full to drain any water left in the pipe.
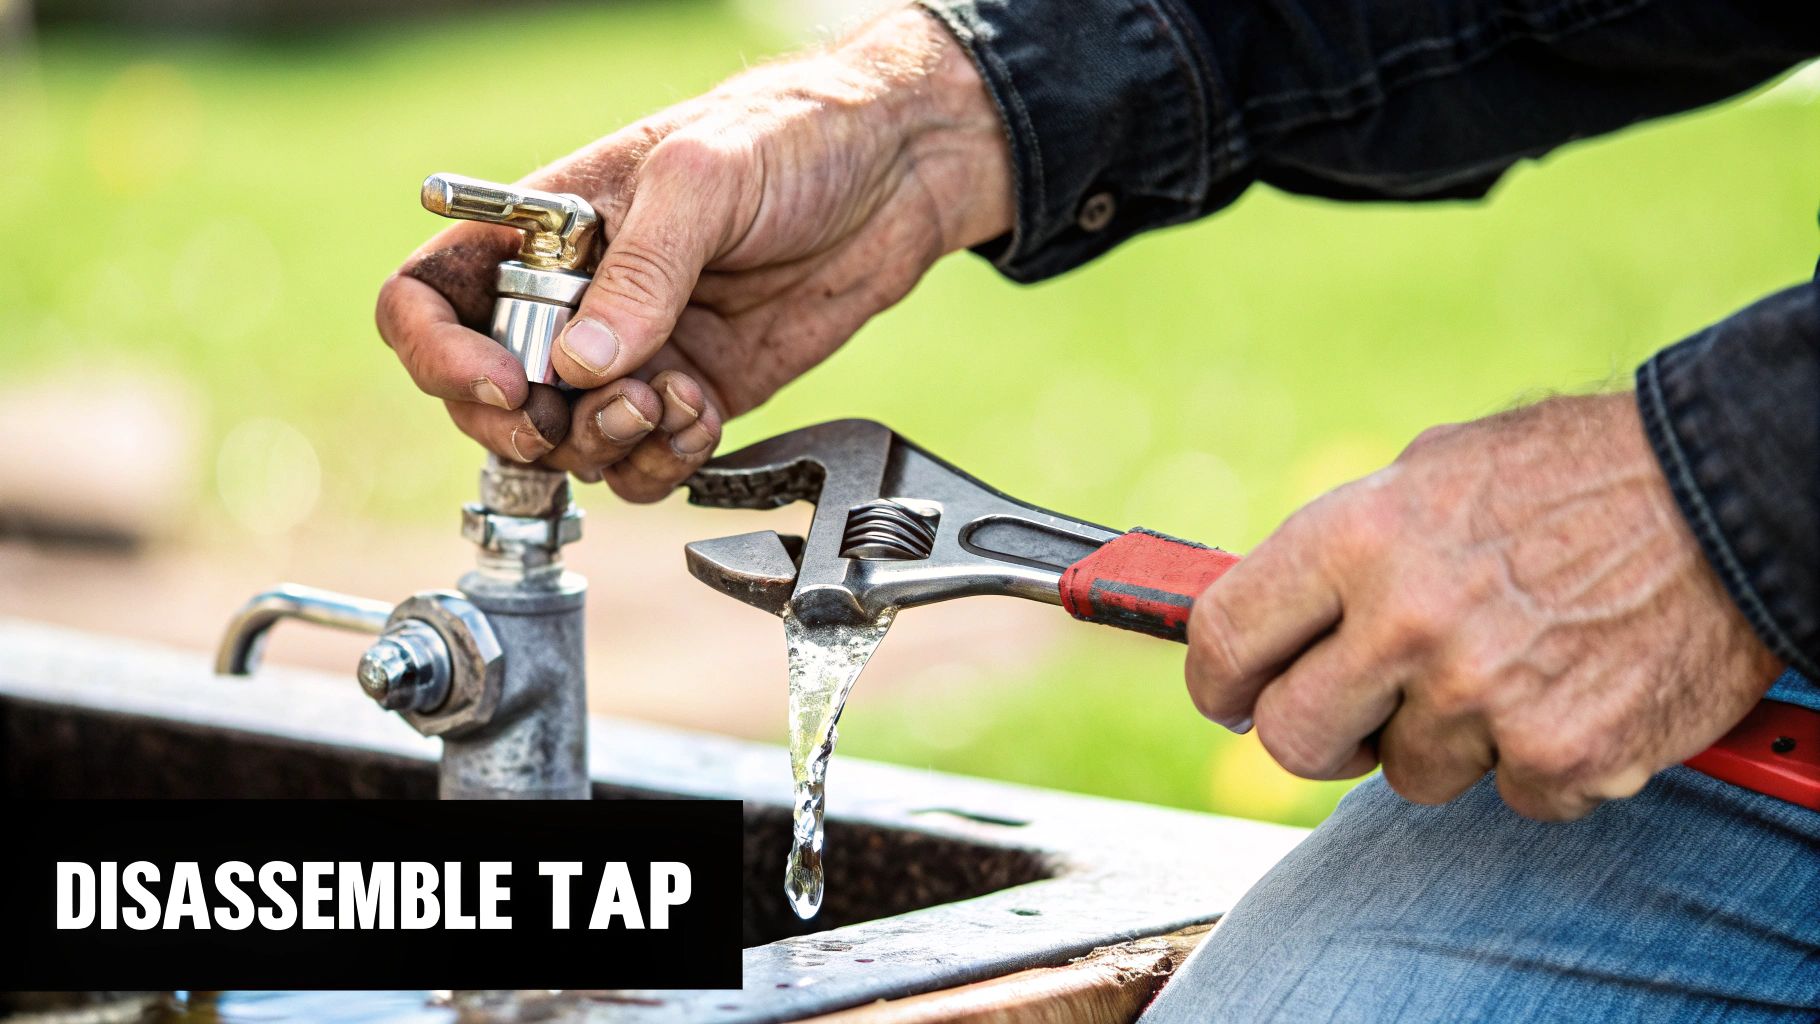
Dismantling the Tap with Care
With the water safely off, it's time to get inside the tap. Most tap handles are held on by a tiny screw, which is often hiding under a decorative cap, usually marked with a red or blue dot. You can carefully pop this cap off with a small, flat-head screwdriver.
Once the screw is out, the handle should lift straight off. I've found that, especially in Eastbourne's hard water areas, limescale can make it stick fast. A firm but gentle wiggle is usually enough to work it loose. With the handle gone, you’ll be looking at the main valve or cartridge. This is what we need to get to.
Safety First: A pro tip we always share at Harrlie Plumbing and Heating is to pop an old towel or a rag in the sink basin before you start. It's a simple step that stops any small screws or parts from vanishing down the plughole, and it protects your porcelain or chrome from getting scratched by your tools.
You’ll probably need your adjustable spanner to unscrew the valve cover or retaining nut. A classic DIY mistake is putting the spanner directly onto the chrome finish, which can leave some nasty scratches. To avoid this, always wrap a cloth around the fitting first to protect the finish and keep your tap looking smart.
Replacing the Worn-Out Component
With the valve exposed, you can now see the culprit. For traditional compression taps, this will be a rubber washer. You can just pull or pry it off and pop the new one on. If you have a more modern tap, you’ll need to lift out the entire ceramic cartridge. Take a second to compare the old part with the new one to make sure it’s an exact match.
Applying a small amount of plumber’s grease to the new O-rings or the seals on a new cartridge is a brilliant move. It helps create a perfect seal and allows the parts to move smoothly, which can seriously extend their lifespan.
To give you a clear visual, this simple process shows the core steps for a standard washer replacement.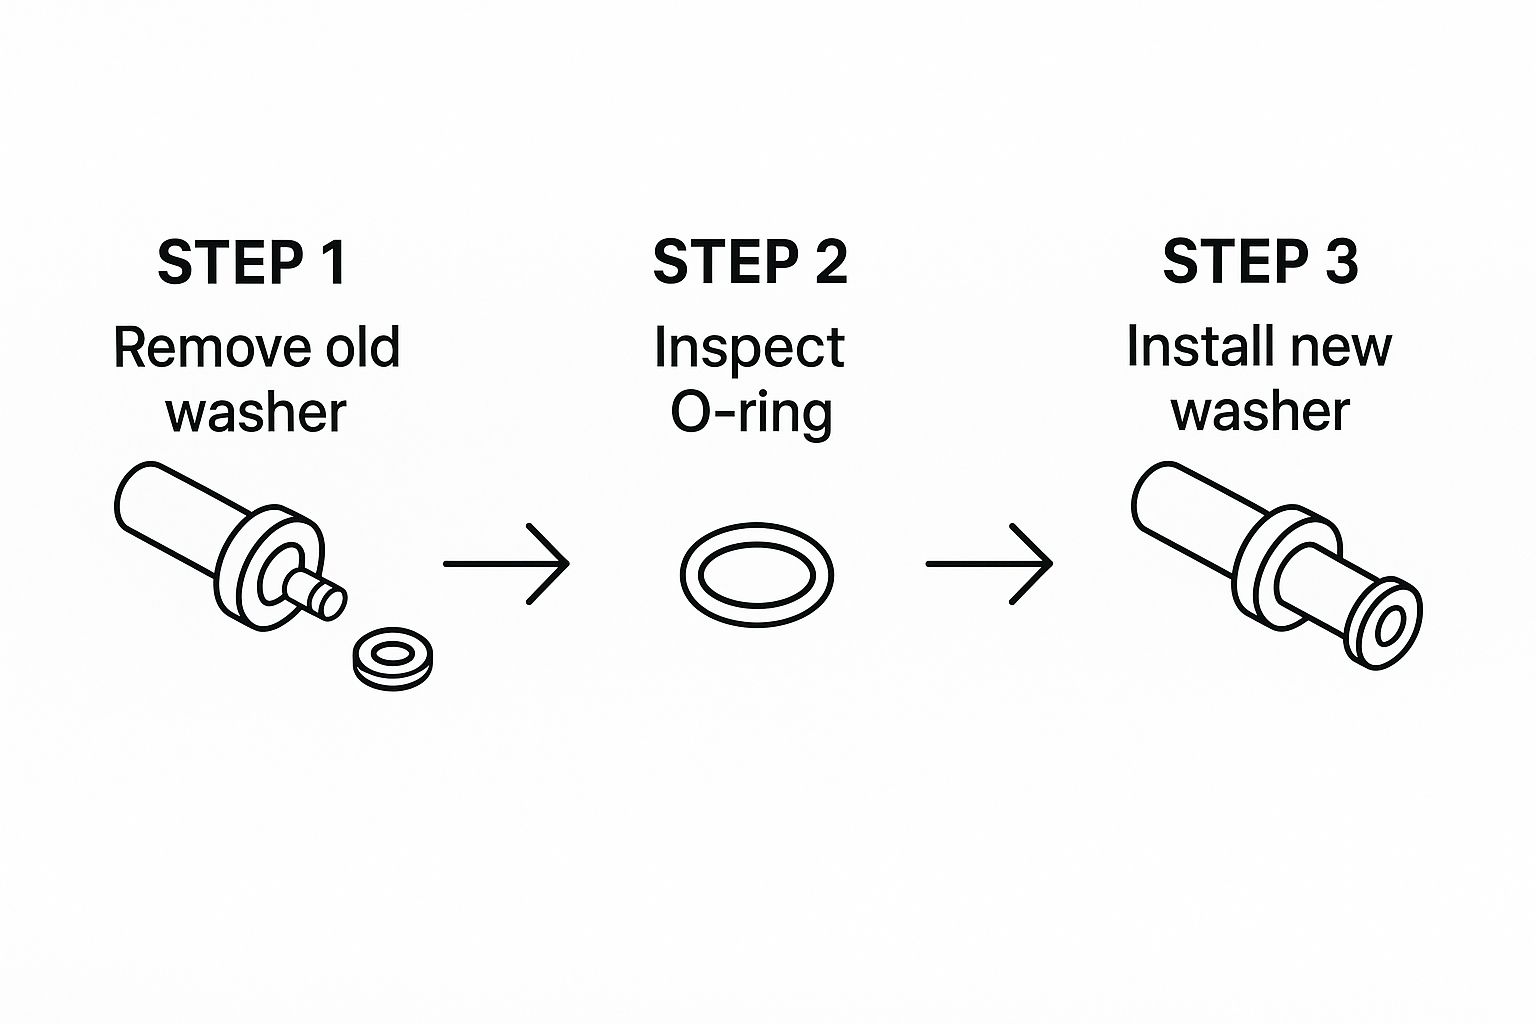
Once your new component is in place, you can reassemble everything in the reverse order you took it apart. Make sure all the connections are snug, but don't be tempted to overtighten them. You can easily damage the new washer or even crack a ceramic cartridge by using too much force.
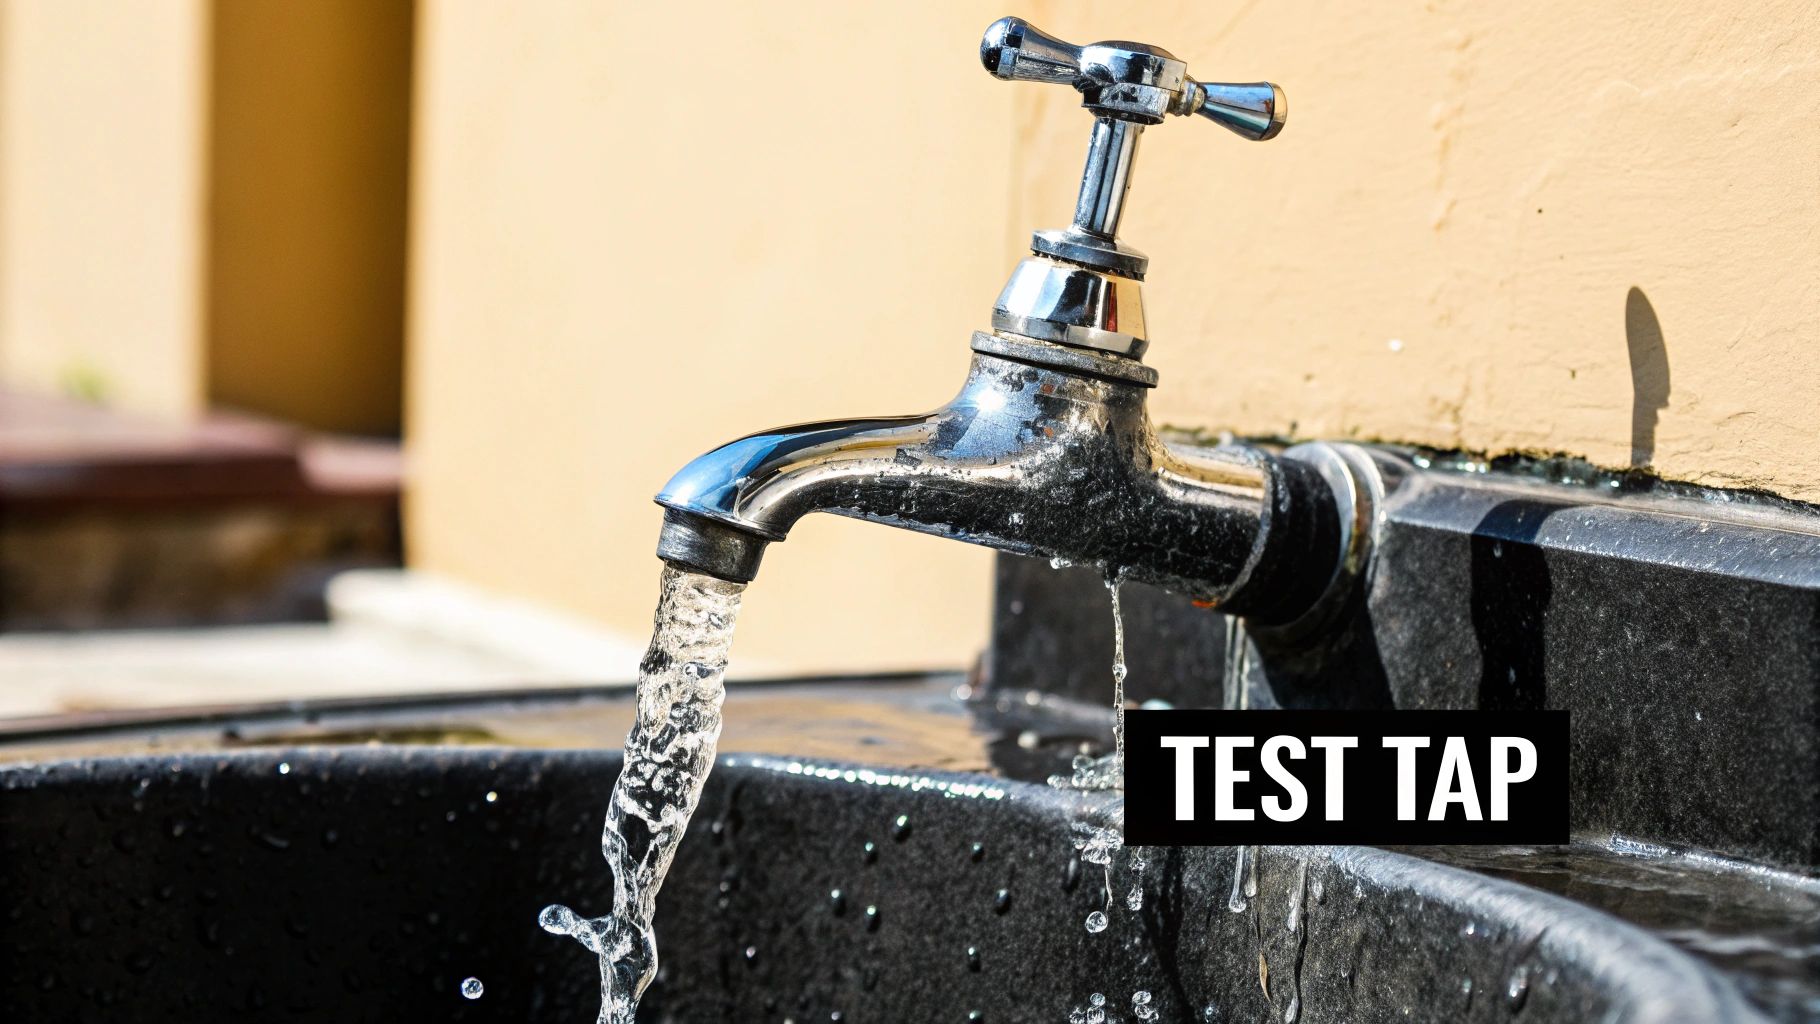
Finally, turn the water supply back on slowly at the isolation valve or stopcock. Check carefully for any drips or weeping around the handle or base of the tap. If everything's dry and the drip is gone, you’ve successfully fixed your leaking tap. Job done
When You Should Call a Professional Plumber
There’s a real sense of achievement that comes from fixing a leaking tap yourself. But sometimes, the smartest move you can make is to put down the spanner and pick up the phone. Knowing your limits isn't a DIY failure; it’s about protecting your home from what could become some seriously expensive damage.
A job that looks simple on the surface can quickly unravel into a much more complicated problem lurking underneath. We see this all the time, especially with the wide range of housing stock in Eastbourne, from modern flats to beautiful but tricky Victorian properties.
Signs You Need an Expert
If you come across any of the following, it’s a clear signal to get a professional opinion from a team like Harrlie Plumbing and Heating.
Heavily Corroded Fittings: If the nuts and fittings are so rusted they refuse to budge, forcing them can shear a pipe right off and trigger a major flood. Our engineers have specialist tools to tackle seized parts without causing a bigger headache.
The Leak Persists: You’ve gone to the trouble of replacing the washer or cartridge, but that maddening drip just won't stop. This often points to a pitted valve seat or even a hairline crack in the tap body itself—issues that need specialist tools or a full replacement.
Damaged Pipework: While under the sink, you might spot that the flexible tap connectors or the copper pipes look corroded, kinked, or are showing signs of dampness. This is a red flag that the problem goes beyond just the tap.
We often get calls from homeowners in Eastbourne who've given a DIY repair their best shot but are still left with a stubborn drip. It’s far better to call us at this point than to risk making things worse. We can quickly get to the root of the problem and make sure the job is done right, the first time.
The Bigger Picture of Water Conservation
Fixing that dripping tap is about more than just peace and quiet in your own home. It’s also a small but meaningful part of a much bigger effort to conserve water right across the UK. Since privatisation, water companies have been under huge pressure to cut down on leakage, and every single repaired tap helps them hit those targets.
In fact, between 2020 and 2024, they were forced to return nearly £50 million to customers for failing to meet leakage reduction goals. You can read more about the UK's water leakage reduction efforts on ofwat.gov.uk. Your small fix contributes to a massive national goal.
Ultimately, if you feel out of your depth at any stage of the repair, calling a professional is always the right call. For complex jobs or a full tap replacement, investing in expertise guarantees a perfect, long-lasting fix. To see how we can help, take a look at our guide on finding trusted plumbers in Eastbourne.
Common Questions About Leaking Taps
Even when you think you've cracked it, a few questions can pop up after you've fixed a leaking tap. It’s completely normal. To help you feel confident in your handiwork, we’ve put together a few of the most common queries we hear from our customers right here in Eastbourne.
These are the nagging doubts that can turn a quick fix into a frustrating afternoon. Getting clear answers is key.
How Long Does a DIY Tap Repair Usually Take?
Honestly, this really depends on your own confidence and the type of tap you’re dealing with.
For a simple washer replacement on a standard compression tap, anyone with a bit of DIY experience can usually sort it in 30 to 60 minutes. But, if you hit a snag like a seized part—a common problem thanks to Eastbourne's hard water limescale—it might take a bit longer. My advice is to always block out more time than you think you'll need. A pro from Harrlie Plumbing and Heating, on the other hand, can typically find and fix a standard drip in under an hour.
What if My Tap Still Leaks After I Replaced the Washer?
This is a really frustrating one, but don’t throw in the towel just yet. If that drip is still there after you’ve fitted a brand-new washer, the culprit is usually one of two things. First, it could be another worn-out seal, like an O-ring, that you might have missed during the disassembly.
More often than not, though, the problem lies with a damaged or pitted valve seat. This is the metal part that the washer presses against to create a seal. Over years of use, friction and mineral deposits can etch tiny grooves into its surface, stopping the new washer from sealing perfectly. While you can sometimes grind it smooth again with a special reseating tool, it often signals that the tap itself has reached the end of its life and needs replacing.
Here's a crucial tip: never try to stop a drip by overtightening the handle. It’s a surefire way to wreck the new washer and permanently damage the valve seat, making a small problem much worse. The issue is a failed seal, not a loose component.
Why Does My Tap Seem to Leak More at Night?
You’re not imagining it! This is a classic plumbing puzzle, and the answer is all about changes in mains water pressure.
During the day, when everyone in your Eastbourne neighbourhood is using water for showers, washing machines, and so on, the pressure in the system is naturally lower. But overnight, when demand drops right off, the pressure in the mains pipes creeps back up. That extra bit of force is often all it takes to push water past a seal that was already on its last legs but was just about coping during the day. It’s a clear warning sign that a part is failing and needs your attention sooner rather than later.
Still wrestling with a stubborn drip, or just not sure where to even begin? Don’t let a minor plumbing headache spiral into a major one. For fast, reliable, and professional help in Eastbourne and the surrounding areas, you can trust the experts at Harrlie Plumbing and Heating.

Comments