8 Smart Ideas for Bathroom Remodeling on a Budget in 2025
- Luke Yeates
- Oct 4, 2025
- 16 min read

Dreaming of a fresh, modern bathroom but worried about the cost? You're not alone. Many homeowners in Eastbourne believe a full renovation is the only way to achieve a stunning new look, often putting it off due to budget concerns. The good news is that a complete overhaul isn't always necessary. A successful bathroom remodeling on a budget is entirely achievable with smart planning, creative thinking, and a focus on high-impact, low-cost updates.
This guide will walk you through eight practical, affordable strategies to transform your space without breaking the bank. From simple cosmetic changes like a fresh coat of paint to clever DIY projects, you’ll discover how to get that luxurious feel you've been wanting. We’ll provide actionable tips tailored for homes right here in Sussex, showing you where to focus your efforts for maximum impact.
Whether it’s swapping out tired taps or revitalising an old vanity, these ideas are designed to be both effective and economical. As Eastbourne's local experts, our team at Harrlie Plumbing and Heating often advises clients on these very steps. Let's explore how to revitalise your bathroom, making it both beautiful and functional, one smart step at a time.
1. Paint Instead of Major Surface Replacements
Of all the strategies for a bathroom remodelling on a budget, none offer a more dramatic transformation for less cost than a fresh coat of paint. Tearing out and replacing vanities, tiles, and cabinetry can consume a significant portion of your budget. Instead, strategically applying paint can modernise these surfaces, making the entire space feel brand new without the expense and disruption of a full replacement.

The key is to use the right products designed for the high-moisture environment of a bathroom. This approach allows you to achieve a high-end look while allocating funds to other essential upgrades, like plumbing fixtures or improved lighting.
How to Use Paint Effectively
Vanities and Cabinets: Dated wooden cabinets, such as the once-popular honey oak, can be completely revitalised. Painting them a crisp white, a sophisticated grey, or a bold navy blue can instantly update the room's aesthetic. A homeowner in the Old Town area of Eastbourne, for example, could paint their vanity a deep sea-green to reflect the nearby coastal scenery.
Tiles: If your tiles are structurally sound but stylistically outdated, specialised tile paint is an excellent solution. It can cover old patterns and colours, giving you a clean, uniform surface for a fraction of the cost of re-tiling.
Walls: Don't underestimate the power of wall colour. A dark, moody accent wall behind a vanity can create a sense of depth and luxury. Conversely, a light, bright colour can make a small bathroom feel more spacious and airy.
Pro Tip: When planning your project, consider the entire colour scheme. A cohesive palette is crucial for a professional finish. Explore our ultimate guide to planning the perfect bathroom renovation in Eastbourne for more tips on creating a unified design.
Actionable Tips for a Flawless Finish
To ensure your paint job lasts, proper preparation is essential.
Choose the Right Paint: Opt for a high-quality paint specifically formulated for bathrooms with moisture and mildew-resistant properties. A satin or semi-gloss finish is ideal as it's durable and easy to wipe clean.
Preparation is Paramount: Thoroughly clean and sand all surfaces before painting. Use a primer designed for high-humidity areas to ensure the paint adheres properly.
Remove Hardware: For a professional look, always remove handles, hinges, and other hardware from cabinets and vanities before you begin painting.
Allow Ample Drying Time: Bathrooms are naturally humid. Be patient and allow extra drying time between coats to prevent peeling or bubbling.
2. Update Hardware and Fixtures
Swapping out dated hardware and fixtures is one of the most impactful yet simple strategies for a bathroom remodelling on a budget. Small details like cabinet handles, taps, and light fittings can define the entire character of a room. Replacing builder-grade or worn-out items with modern alternatives provides a significant aesthetic lift without the need for extensive plumbing work or structural changes.
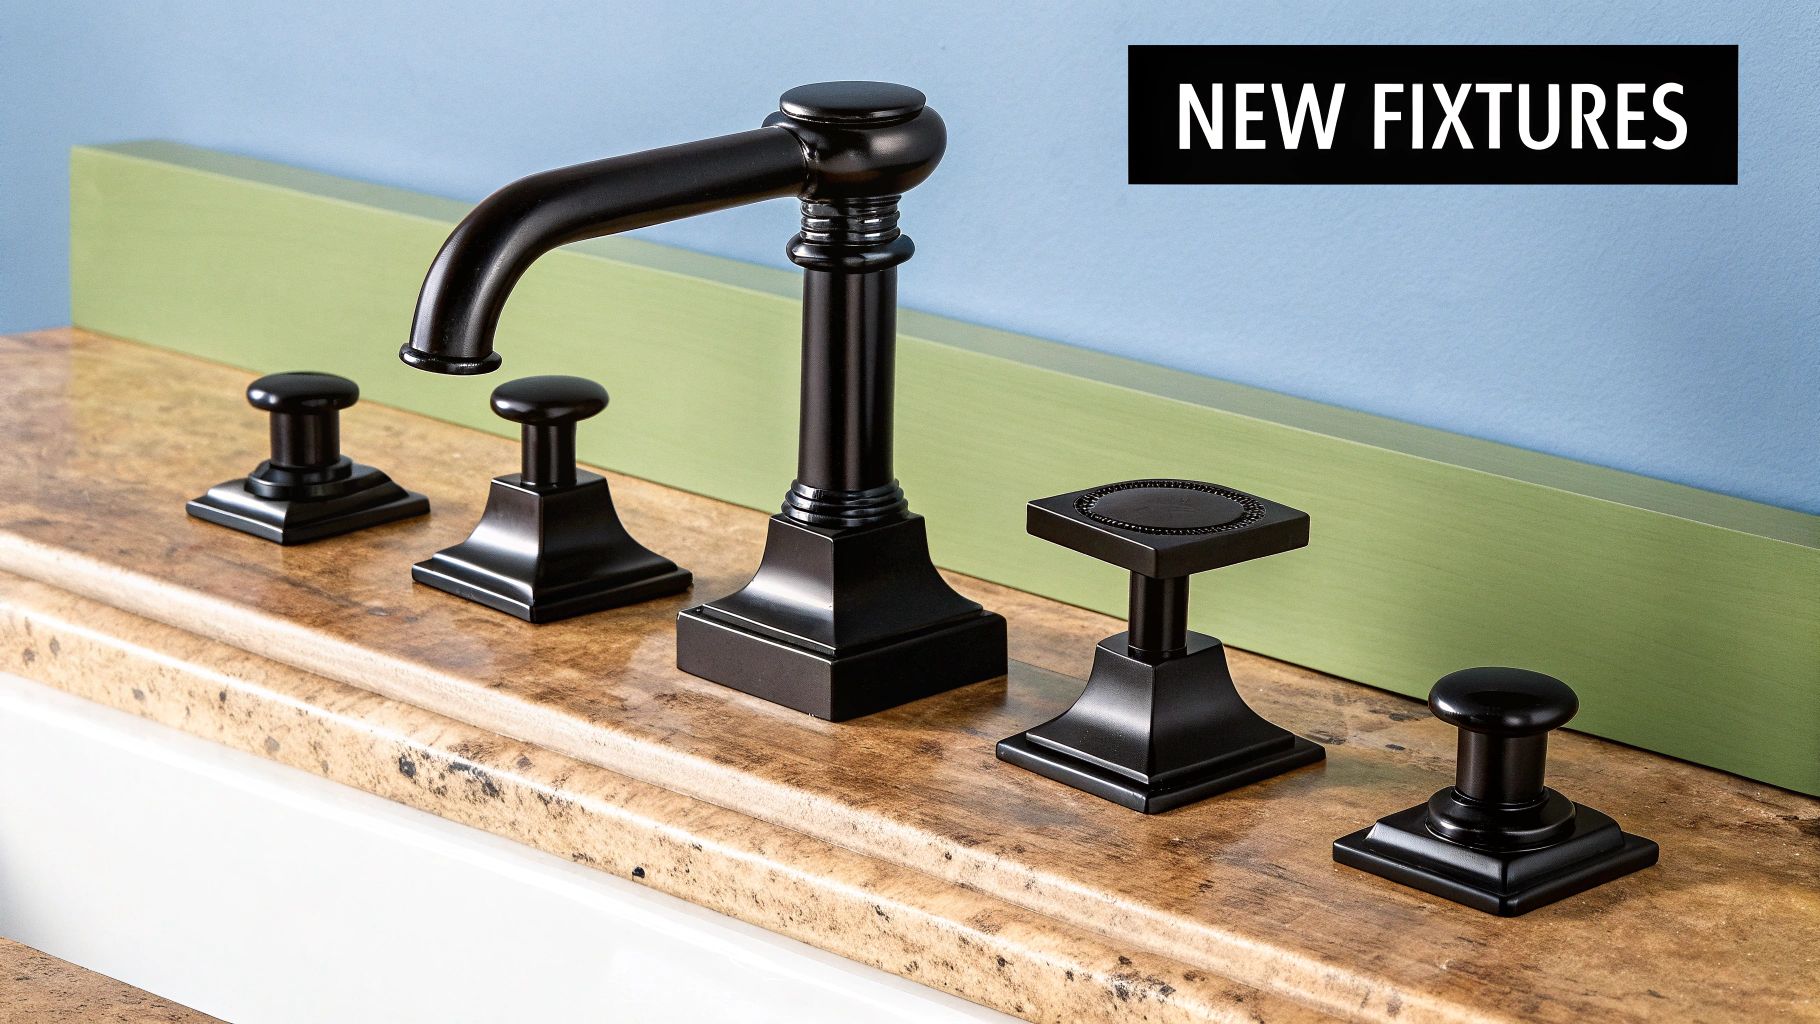
This high-impact, low-effort upgrade can instantly modernise your space. A cohesive set of new fixtures makes a bathroom feel thoughtfully designed and luxurious, elevating the entire room's perceived value for a minimal investment.
How to Update Hardware and Fixtures Effectively
Cabinet Hardware: Replace old, clunky knobs and pulls with sleek, modern designs. For instance, swapping traditional chrome handles for geometric matte black pulls on a painted vanity can create a striking contemporary look.
Taps and Showerheads: Upgrading a standard tap to a waterfall or mixer tap can transform your basin area. Similarly, installing a rainfall showerhead can give your daily routine a spa-like feel.
Lighting and Accessories: Don't overlook the light fixtures, towel rails, and toilet roll holders. A homeowner in Eastbourne’s Meads village might choose elegant brass fixtures to complement the area's Victorian architecture, instantly adding a touch of class.
Pro Tip: For those undertaking a budget-friendly renovation, these DIY tips for installing building hardware can empower you to update fixtures confidently and achieve a professional result without hiring extra help.
Actionable Tips for a Flawless Finish
To ensure your new hardware looks fantastic and functions perfectly:
Measure First: Before buying new cabinet pulls, measure the distance between the existing screw holes (the "centre-to-centre" measurement) to ensure a direct fit.
Buy as a Set: Purchase all your hardware, from taps to towel rails, from the same collection or brand to guarantee the finish is consistent. Mismatched shades of brushed gold or matte black can cheapen the overall effect.
Seal Properly: When installing new taps or a showerhead, always use PTFE (thread seal) tape on the threads to prevent leaks. If you're unsure, our experts at Harrlie Plumbing and Heating can handle the installation for you.
Upgrade to LED: When replacing light fixtures, opt for energy-efficient LED bulbs. They last longer and consume less electricity, saving you money in the long run.
3. DIY Vanity Makeover
A brand-new vanity can be one of the most expensive single items in a bathroom renovation, but a DIY makeover offers a powerful way to achieve a custom, high-end look. This is a key strategy for any bathroom remodelling on a budget, allowing you to completely transform your existing unit or repurpose furniture into a unique centrepiece for a fraction of the cost of a new purchase.
This approach saves hundreds of pounds while giving you complete creative control. You can tailor the final piece perfectly to your bathroom's size, style, and functional needs, creating something truly one-of-a-kind.
How to Execute a Vanity Makeover
Paint and Hardware: The simplest makeover involves painting the existing vanity base and replacing the handles or knobs. Swapping tired chrome for modern matte black or brushed brass hardware can instantly elevate the entire piece.
New Countertop: If the base is solid, just replacing a dated laminate top can make a huge difference. For your DIY vanity makeover, a key decision is understanding how to select your best bathroom vanity countertop materials to fit both your style and budget.
Creative Upcycling: A truly unique approach is converting a vintage dresser or sideboard into a vanity. A homeowner in the Meads area of Eastbourne could find a beautiful antique piece at a local market and have our team at Harrlie Plumbing and Heating expertly handle the plumbing modifications to install a stylish vessel sink.
Pro Tip: When upcycling furniture, always check that the height is comfortable for a vanity (typically 80-90cm) and that the drawers can be modified to accommodate the sink basin and plumbing without sacrificing too much storage.
Actionable Tips for a Flawless Finish
To ensure your DIY vanity is both beautiful and functional, planning is crucial.
Protect Wood Surfaces: If using a wooden countertop like butcher block or upcycling a wooden dresser, seal it with several coats of marine-grade varnish to protect it from water damage.
Measure for Plumbing: Before cutting any holes for the sink and tap, double-check all measurements. Ensure there is adequate clearance for the P-trap and supply lines inside the cabinet.
Get a Professional Plumber: While the cosmetic work can be a DIY project, we always recommend having a professional plumber connect the sink and tap. This prevents leaks that could damage your hard work. Our team at Harrlie Plumbing and Heating frequently helps Eastbourne residents with these crucial final connections.
Consider Functionality: Think about adding enhancements like drawer organisers, interior lighting, or even integrated power outlets to make your custom vanity as practical as it is stylish.
4. Strategic Tile Updates
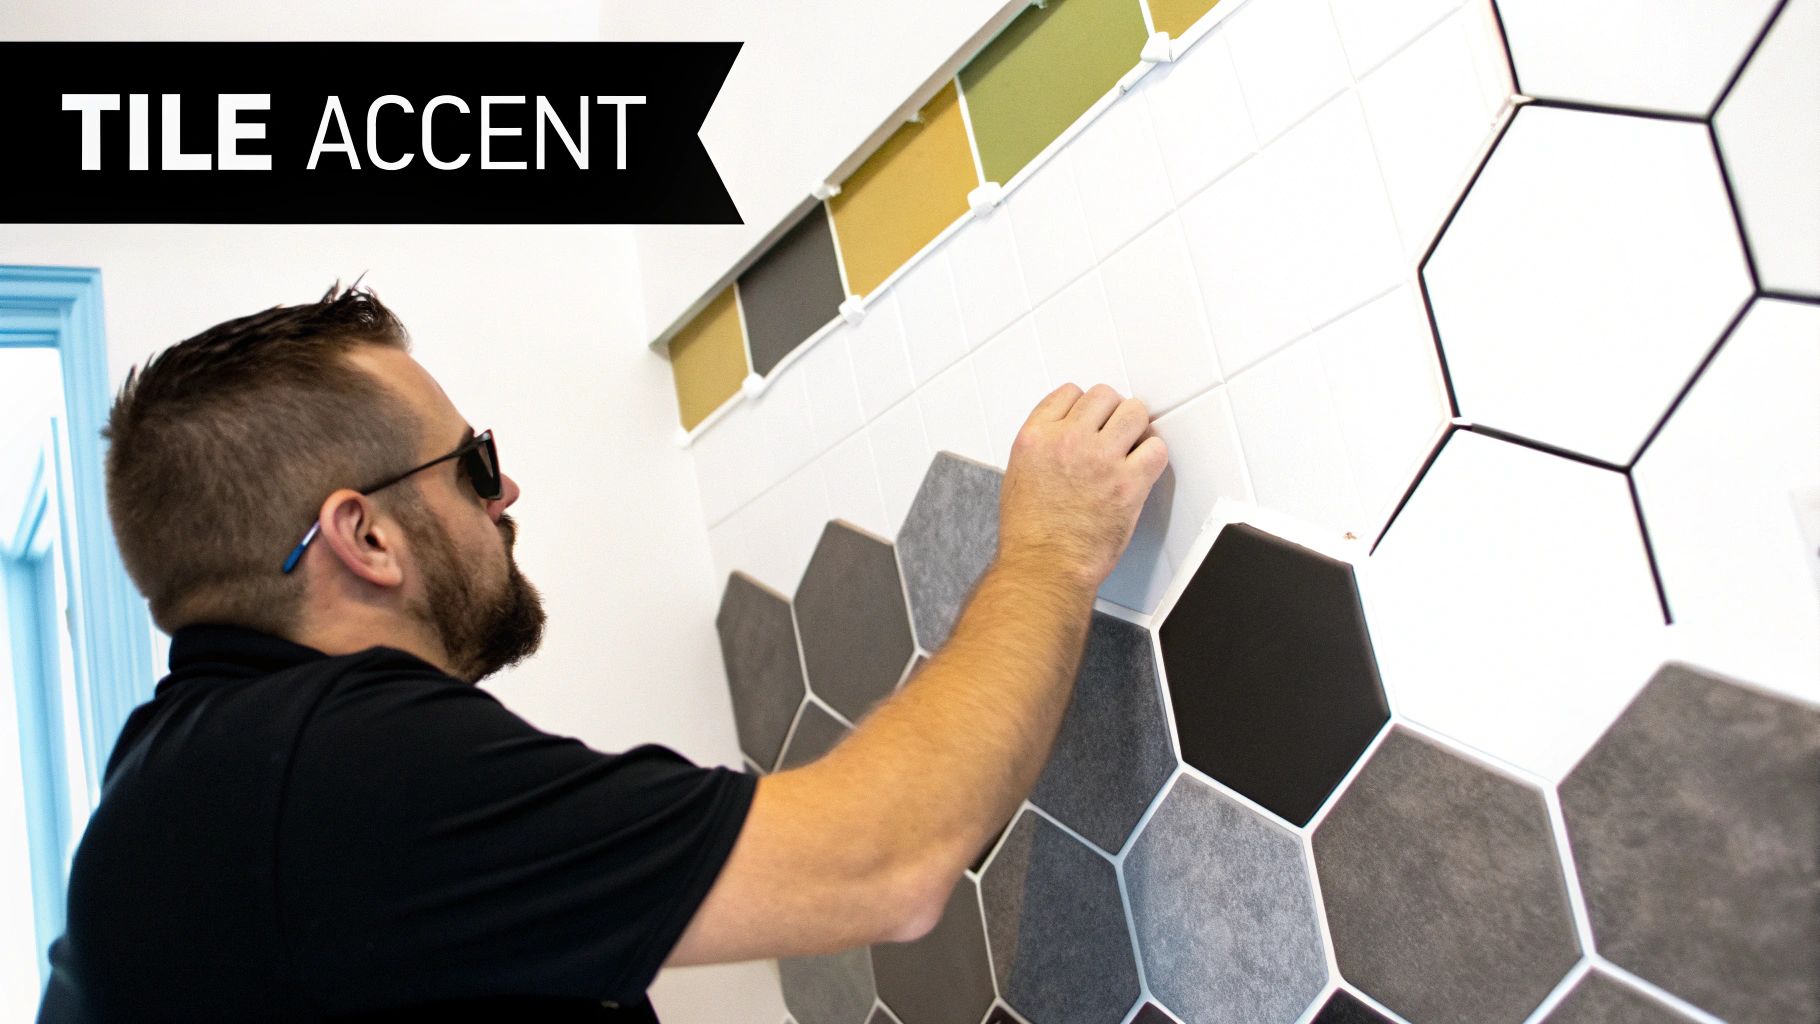
Tiling can be one of the most expensive parts of a bathroom renovation, but a full re-tile is often unnecessary for a fresh look. Strategic tile updates offer a powerful way to modernise your space while managing costs. Instead of tearing out every tile, this approach focuses on high-impact areas, delivering a significant visual upgrade for a fraction of the price and effort.
This method is a core component of any effective bathroom remodelling on a budget, allowing you to create a designer feel without the associated expense. By concentrating your efforts, you can make a bold statement, fix outdated styles, and add personality to your bathroom.
How to Use Strategic Tiling Effectively
Create an Accent Wall: Tiling a single, prominent wall, such as the one behind the vanity or toilet, can serve as a stunning focal point. A homeowner in the Meads village area of Eastbourne could use classic subway tiles here to create a timeless, clean look that brightens the entire room.
Install a Decorative Border: Adding a new border of mosaic tiles at chair-rail height can break up a monotonous wall of old tiles. This adds a touch of colour and pattern without requiring a complete overhaul.
Update with Peel-and-Stick Tiles: Modern peel-and-stick tiles are a DIY-friendly game-changer. They are durable, water-resistant, and perfect for updating a small area like a shower niche, a splashback, or even the entire floor with a bold new pattern.
Pro Tip: Choosing the right tile is just as important as where you place it. For help navigating the options, our practical guide on how to choose bathroom tiles offers valuable insights for your project.
Actionable Tips for a Flawless Finish
To ensure your new tiles look professional and last for years, careful application is key.
Prepare Your Surface: The success of any tile job, especially with peel-and-stick products, depends on a clean, dry, and perfectly smooth surface.
Order Extra: Always purchase about 10% more tiles than you think you need. This surplus accounts for any mistakes during cutting and ensures you have matching tiles for future repairs.
Use Spacers: Even when using peel-and-stick sheets, tile spacers are crucial for maintaining consistent, even grout lines for a polished, professional appearance.
Consider Grout Colour: The colour of your grout can dramatically change the final look. A contrasting grout colour will make the tile pattern pop, while a matching colour creates a more subtle, seamless effect.
5. Improve Lighting and Add Mirrors
A common mistake in a bathroom remodelling on a budget is overlooking the transformative power of lighting and mirrors. These elements work together to manipulate perception, making even the most compact bathrooms feel significantly larger, brighter, and more luxurious. Upgrading your lighting and incorporating well-placed mirrors is a cost-effective strategy to enhance both the room's atmosphere and its everyday functionality.
This approach delivers a high-impact visual upgrade without the expense of moving walls or resizing windows. By carefully selecting and positioning these fixtures, you can create a sophisticated and inviting space while staying comfortably within your budget.
How to Use Lighting and Mirrors Effectively
Task Lighting: Great lighting isn't just about brightness; it's about eliminating shadows. Installing vertical sconces or LED vanity lights on either side of the mirror provides even, flattering illumination for daily grooming tasks.
Create Space: A large, frameless mirror is a classic designer trick for creating the illusion of depth. Placing it opposite a window will amplify natural light, making the entire room feel more open and airy. A bathroom in a Meads village home, for instance, could use a large mirror to reflect light and views from a garden-facing window.
Accent Lighting: Add a touch of modern luxury with subtle accent lighting. Affordable, battery-operated LED strips can be installed under a floating vanity or behind a mirror to create a soft, ambient glow.
Pro Tip: For a truly customisable atmosphere, consider installing dimmer switches. This allows you to transition from bright, functional light in the morning to a soft, relaxing ambience in the evening.
Actionable Tips for a Flawless Finish
To maximise the impact of your new lighting and mirrors, careful installation is key.
Position Lights Correctly: Mount wall lights at roughly eye level (around 60-65 inches from the floor) to minimise unflattering shadows on your face.
Secure Mirrors Safely: Ensure large or heavy mirrors are properly anchored. Our team at Harrlie Plumbing and Heating can advise on securely fixing items to different wall types, especially in older Eastbourne properties with varied construction.
Choose the Right Bulbs: Opt for LED bulbs, which are energy-efficient and offer a range of colour temperatures. A "daylight" bulb provides crisp, clear light ideal for a bathroom setting.
Layer Your Lighting: Combine different light sources. An overhead ceiling fixture provides general illumination, while dedicated task lighting at the vanity ensures the space is functional.
6. Enhance Storage with DIY Solutions
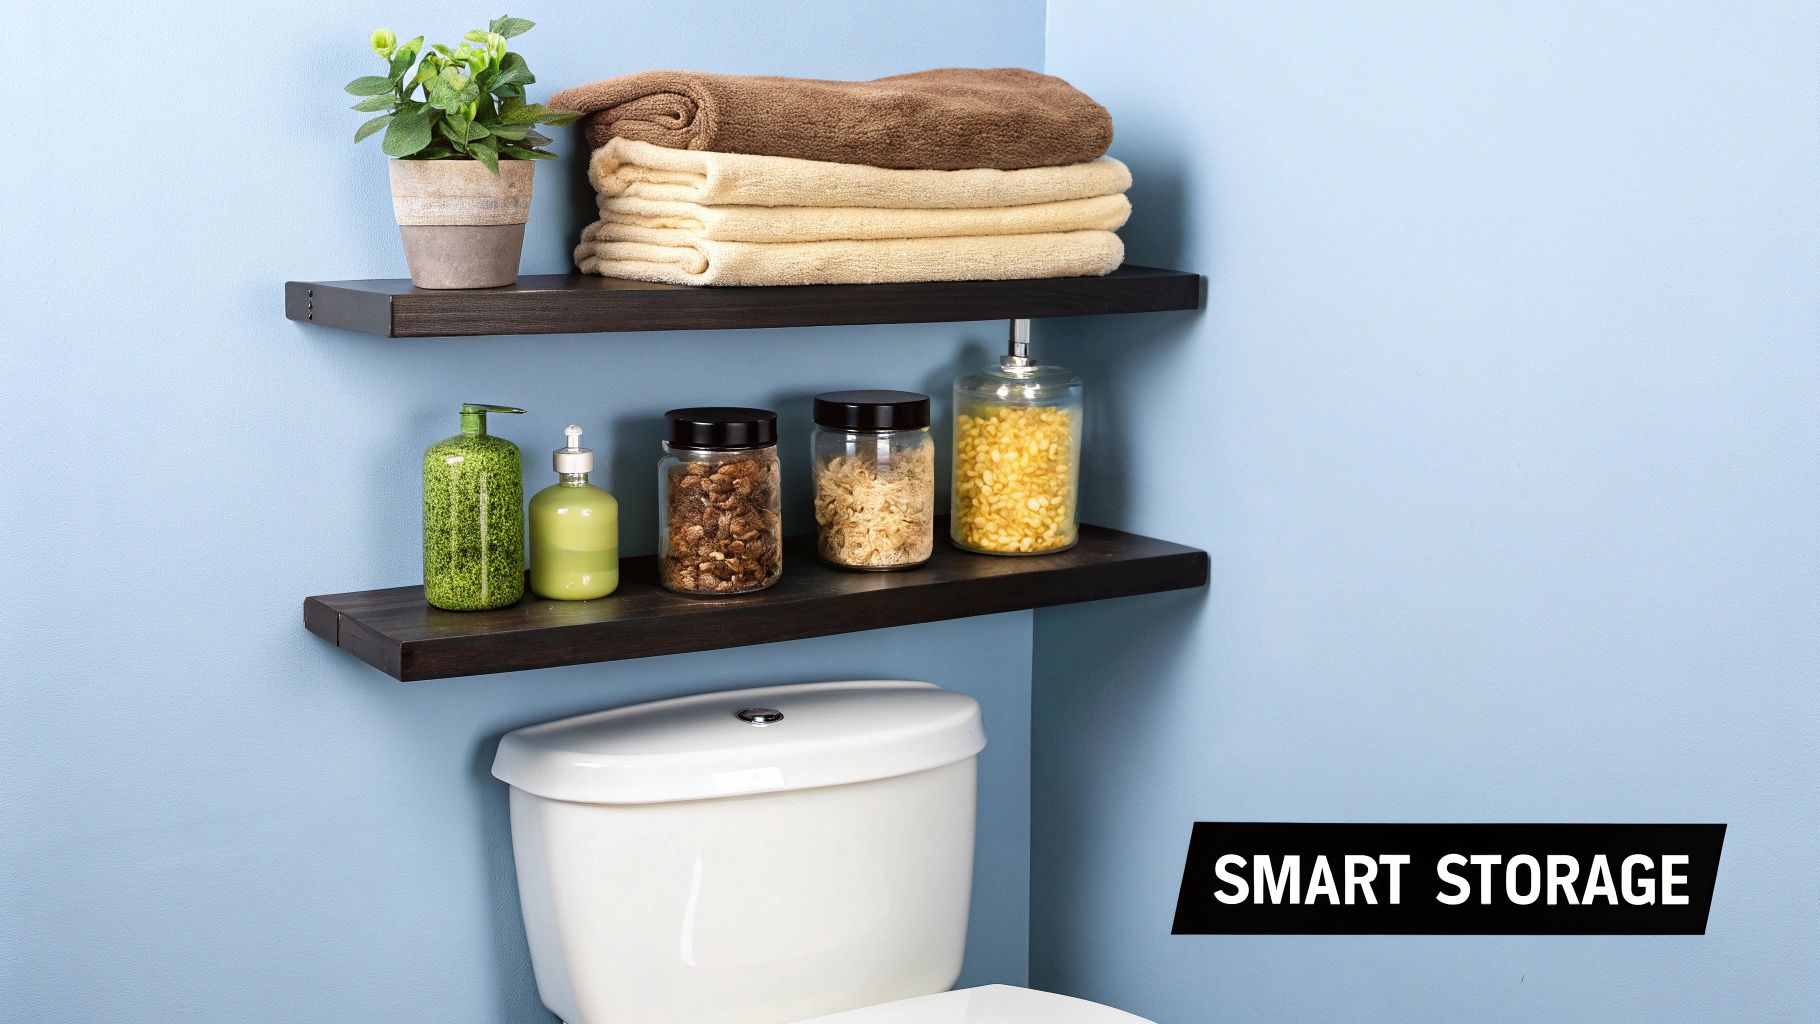
A common challenge in many bathrooms, especially in older Eastbourne properties, is a lack of adequate storage. While a full bathroom remodelling on a budget might seem necessary to solve this, clever DIY solutions can add significant functionality and style without the expense of custom cabinetry. Creative storage not only declutters surfaces but also enhances the overall organisation and aesthetic appeal of your space.
This approach focuses on using vertical space and multi-functional pieces to keep your bathroom tidy. By building or repurposing items yourself, you can create bespoke storage solutions that perfectly fit your needs and style, all while keeping costs impressively low.
How to Implement DIY Storage Effectively
Floating Shelves: Simple floating shelves offer a minimalist way to store toiletries, towels, and decorative items. Installing them above the toilet or in an unused corner maximises wall space without making the room feel crowded.
Ladder Shelving: A freestanding or wall-leaning ladder shelf is a stylish, non-permanent option. It provides multiple tiers for baskets, folded towels, and plants, adding a touch of rustic charm popular in coastal homes around the Meads area.
Repurposed Items: Think outside the box by converting vintage crates or old wooden boxes into wall-mounted cubbies. A small crate mounted on the wall can hold loo rolls, with a simple towel rail attached underneath for added utility.
Pro Tip: Before drilling into any walls, especially those containing plumbing, it's wise to get professional advice. A quick consultation with a local expert like Harrlie Plumbing and Heating can help you identify pipe locations and avoid costly mistakes.
Actionable Tips for a Flawless Finish
To ensure your DIY storage is both beautiful and durable, focus on the details.
Choose Moisture-Resistant Materials: Opt for materials that can withstand a humid environment, such as bamboo, treated wood, or specially coated MDF. This prevents warping and mould growth over time.
Use Proper Fixings: Securely fasten your shelves and cabinets to the wall using the correct anchors and fixings for your wall type (e.g., plasterboard vs. brick).
Plan Your Layout: Before you start, consider what you need to store. Plan shelf heights to accommodate tall bottles and ensure frequently used items are easily accessible.
Combine Form and Function: Mix practical storage, like baskets for toiletries, with decorative elements, like a small plant or a scented candle, to create a space that feels both organised and personalised.
7. Update Window Treatments and Accessories
Often overlooked in a major renovation, updating soft furnishings and accessories is a powerful strategy for a bathroom remodelling on a budget. These elements, including window treatments, shower curtains, rugs, and towels, are among the least expensive ways to introduce new colours, patterns, and a sense of personality into your space. They can completely shift the mood and style without any demolition.
This approach offers maximum visual impact for minimal investment and effort. It allows you to refresh the bathroom's look seasonally or whenever you desire a change, keeping the space feeling current and thoughtfully designed.
How to Use Accessories Effectively
Window Treatments: Swap a basic plastic blind for something with more texture and warmth. Woven bamboo or faux-wood blinds can introduce a natural, spa-like element that complements the coastal environment of areas like Meads in Eastbourne.
Shower Curtains: A new shower curtain can act as a large piece of art. Replace a plain liner with a high-quality fabric curtain in a bold botanical print or a sophisticated geometric pattern to create an instant focal point.
Coordinated Accessories: Grouping new items like a matching soap dispenser, toothbrush holder, and waste bin can make the space feel intentionally designed and organised.
Pro Tip: Think of your accessories as the final layer of your design. Once the foundational elements are in place, these pieces tie everything together. A new set of plush towels in a complementary colour can make the entire room feel more luxurious.
Actionable Tips for a Flawless Finish
To ensure your new accessories elevate the space, consider both form and function.
Choose Moisture-Resistant Materials: Opt for materials designed to withstand a humid environment. Look for quick-drying fabrics, mildew-resistant shower curtains, and bath mats with non-slip backing.
Coordinate Your Metals: Ensure new metallic accessories like towel rings or toilet roll holders match the finish of your taps and shower fixtures. If you're upgrading fixtures, the experts at Harrlie Plumbing and Heating can advise on finishes that work well with popular accessory trends.
Start with a Neutral Base: If your main surfaces are neutral, you have the freedom to be bold with your accessories. This makes it easy and affordable to change your colour scheme in the future.
Ensure Proper Ventilation: New textiles can trap moisture. Ensure your extractor fan is working correctly to prevent the growth of mould and mildew, preserving the life of your new accessories.
8. Deep Clean and Repair
Before you consider tearing anything out, one of the most effective strategies for a bathroom remodelling on a budget is to focus on deep cleaning and minor repairs. Years of soap scum, hard water stains, and discoloured grout can make a bathroom look tired and dated, but this foundational work can make existing elements look new again for a minimal cost.
This approach restores the crisp, clean appearance of your bathroom and is an essential first step before any cosmetic updates like painting. A thorough refresh highlights what truly needs replacing and what can be salvaged, saving you significant money in the long run.
How to Use Deep Cleaning and Repairs Effectively
Grout and Caulk Revival: Over time, grout can become stained and caulk can peel or grow mould. Regrouting and recaulking around tubs, sinks, and showers creates sharp, clean lines that immediately make the space look fresher and better maintained.
Tackle Hard Water Stains: The hard water common in Eastbourne can leave stubborn stains on glass shower doors, taps, and tiles. Using specialised cleaners can restore the sparkle to these surfaces, making them look brand new without the need for replacement.
Address Minor Leaks: A dripping tap not only wastes water but can also cause staining in your basin or bath. Tackling these small repairs prevents further damage and improves the overall function and appearance of your bathroom fixtures.
Pro Tip: When deep cleaning, pay close attention to ventilation. Ensure fans are working correctly or open a window to prevent moisture build-up, which is a leading cause of mould and mildew growth.
Actionable Tips for a Flawless Finish
To make your existing bathroom shine, meticulous attention to detail is key.
Choose the Right Products: Use professional-grade grout cleaners and a stiff brush to lift deep-set grime. For hard water, a solution of white vinegar or a specialised limescale remover works wonders.
Remove Old Caulk Completely: Before applying new silicone sealant, use a caulk removal tool to scrape away every trace of the old material. This ensures a clean surface and a watertight seal.
Fix Leaks Promptly: Don't let a small drip turn into a bigger problem. Small repairs are often simple DIY jobs, and for anything more complex, professional help from a team like Harrlie Plumbing and Heating is just a call away. You can find useful advice in our Eastbourne DIY repair guide to fixing a leaking tap.
Allow Proper Curing Time: After applying new grout or caulk, follow the manufacturer’s instructions and allow it to cure fully before exposing it to water. This is crucial for long-lasting results.
8 Budget Bathroom Remodel Strategies Comparison
Item | Implementation Complexity 🔄 | Resource Requirements ⚡ | Expected Outcomes 📊 | Ideal Use Cases 💡 | Key Advantages ⭐ |
|---|---|---|---|---|---|
Paint Instead of Major Surface Replacements | Low 🔄 (basic prep and painting) | Minimal ⚡ (paint, brushes/rollers) | Modern look, cohesive appearance 📊 | Updating cabinets, walls, or tile surfaces | Cost-effective, quick weekend project, easy updates |
Update Hardware and Fixtures | Low to Medium 🔄 (simple swaps, some plumbing skill) | Moderate ⚡ (fixtures, basic tools, possible pro) | High design impact, refreshed style 📊 | Upgrading knobs, faucets, light fixtures | Visual upgrade, DIY-friendly, portable investment |
DIY Vanity Makeover | Medium to High 🔄 (multiple steps, some carpentry) | Moderate ⚡ (paint, hardware, countertop materials) | Customized vanity, improved function 📊 | Customizing existing vanities | Cost savings, personalized style, environmental reuse |
Strategic Tile Updates | Medium 🔄 (partial tiling or peel-and-stick application) | Moderate ⚡ (tiles or tile paint, adhesive, tools) | Accent features, bold design elements 📊 | Accent walls, borders, shower niche updates | Dramatic impact, affordable alternative to full tile |
Improve Lighting and Add Mirrors | Medium 🔄 (electrical work possible, mirror mounting) | Moderate ⚡ (fixtures, mirrors, wiring materials) | Enhanced brightness and space perception 📊 | Small bathrooms, poor existing lighting | Makes space feel larger, energy-efficient LEDs |
Enhance Storage with DIY Solutions | Medium 🔄 (measuring, installing shelves/racks) | Low to Moderate ⚡ (materials, hardware, tools) | Increased organization and functional space 📊 | Bathrooms with storage shortages | Customizable, budget-friendly, adds style |
Update Window Treatments and Accessories | Low 🔄 (simple swaps, no tools usually) | Low ⚡ (curtains, rugs, blinds, accessories) | Instant style refresh, color and pattern boost 📊 | Quick style updates and seasonal changes | Lowest cost, reversible, flexible styling |
Deep Clean and Repair | Low to Medium 🔄 (labor-intensive, prep work) | Low ⚡ (cleaning products, basic tools) | Refreshed appearance, improved hygiene 📊 | Pre-renovation prep, maintenance | Very low cost, high impact on appearance and function |
Bringing Your Budget-Friendly Bathroom to Life in Eastbourne
Embarking on a bathroom renovation can feel like a daunting financial commitment, but as we've explored, a stunning transformation is entirely achievable, even on a modest budget. The key to a successful bathroom remodeling on a budget lies not in wholesale replacement, but in smart, strategic enhancements that deliver maximum visual impact for minimal cost. From the transformative power of a fresh coat of paint to the subtle elegance of updated cabinet hardware, each tip in this guide is designed to empower you to create a space that feels fresh, modern, and uniquely yours without breaking the bank.
Throughout this journey, we've seen how focusing on high-impact areas can completely revitalise your bathroom. You don't need to rip out all your tiles; a feature wall or a stylish new splashback can redefine the room. You don't need a custom-built vanity; a creative DIY makeover can turn an outdated unit into a striking centrepiece. These smaller, more manageable projects are not just cost-effective; they also offer a satisfying sense of accomplishment and allow for a gradual, phased approach to your renovation.
Key Takeaways for Your Eastbourne Bathroom Project
Let's crystallise the most crucial insights for homeowners in Eastbourne, Hastings, and Bexhill looking to refresh their space affordably:
Prioritise High-Impact, Low-Cost Changes: A weekend spent painting tired walls, updating taps, or even reglazing old tiles will yield far more noticeable results than one expensive, isolated purchase. Think evolution, not revolution.
Embrace the Power of DIY: Many of the most effective budget strategies, such as painting, deep cleaning, and swapping out accessories, are well within the grasp of the average homeowner. This is where you can save significantly on labour costs.
Know When to Call in the Professionals: While DIY is a budget's best friend, some tasks are best left to the experts. Any work involving moving plumbing, fitting new taps or showers, or installing complex fixtures requires professional skill to prevent costly leaks and water damage down the line. A perfectly fitted tap from a professional plumber will always look and perform better than a poorly executed DIY attempt.
The true value in mastering a budget-friendly remodel is achieving a space you love without the financial stress that often accompanies major renovations. It’s about making clever choices that enhance both the aesthetics and functionality of your home. By combining your own creative efforts with targeted professional assistance, you can confidently execute a bathroom project that adds tangible value and daily enjoyment to your Eastbourne property. Your dream bathroom is not a distant, expensive fantasy; it’s a series of well-planned, affordable steps away.
Ready to take the next step and ensure your plumbing updates are handled flawlessly? For reliable, expert assistance with everything from tap installation to full bathroom fitting, trust Harrlie Plumbing and Heating. We specialise in helping Eastbourne homeowners achieve beautiful, functional bathrooms on a budget, providing transparent pricing and quality craftsmanship you can depend on. Visit Harrlie Plumbing and Heating today for a free, no-obligation quote and let's bring your vision to life.

Comments